How to Schedule a Mail Merge Campaign
Introduction
Section titled “Introduction”Scheduling your mail merge campaigns in advance can optimize your outreach efforts by ensuring your emails are sent at the ideal time. BetterMerge (formerly Mailway Mail Merge) makes it easy to set a specific date and time for your campaign. This guide focuses on the scheduling step, which is part of the overall campaign creation process.
Step 1: Enable Scheduling
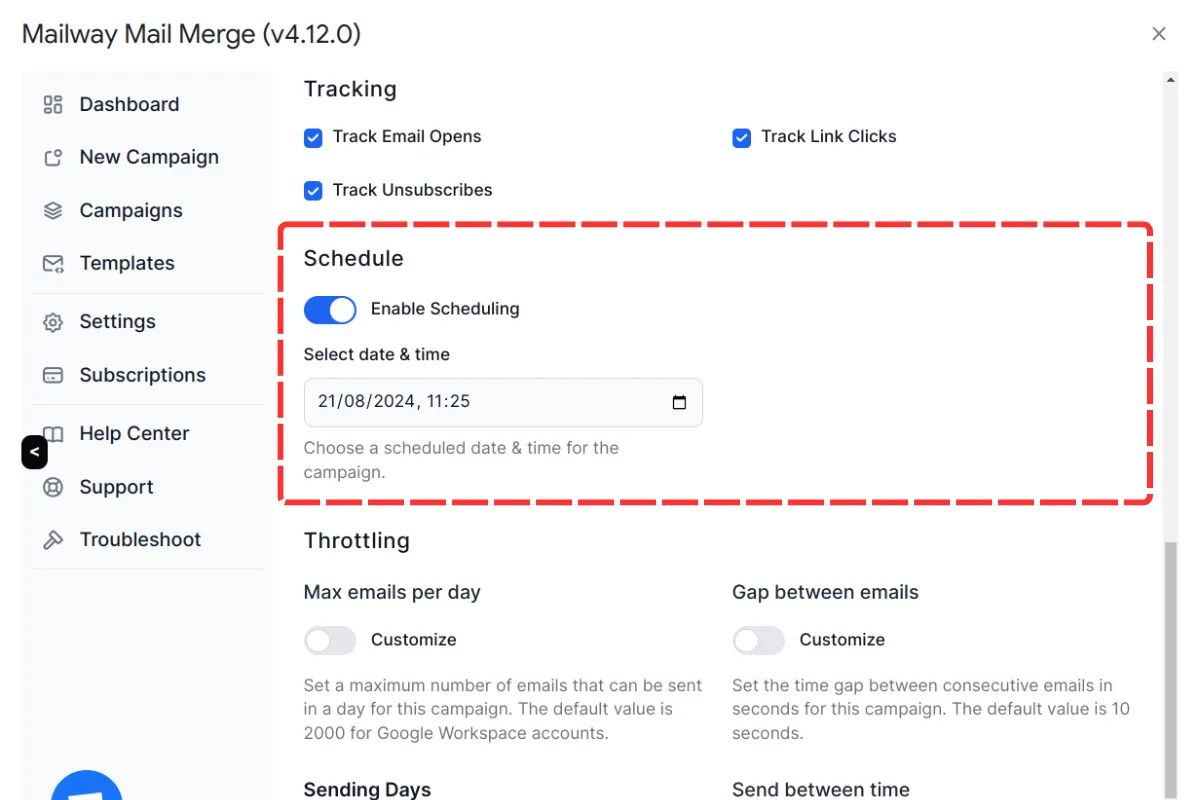
Section titled “Step 1: Enable Scheduling”In the campaign editor, navigate to the ‘Schedule’ section. You’ll find a toggle switch labeled ‘Enable Scheduling.’ Turn this switch on to access the scheduling options.
Step 2: Select Date and Time
Section titled “Step 2: Select Date and Time”After enabling scheduling, a date and time field will appear. Click on the field to open the date picker, and select the desired future date and time for your campaign to be sent. The date picker uses your local timezone to ensure accuracy.
Conclusion
Section titled “Conclusion”This page provides the specific steps for scheduling your campaign. For a comprehensive guide on creating and managing campaigns from start to finish, including recipient selection and tracking, please refer to the Create New Mail Merge Campaign page. Scheduling is just one step in the process—follow the full guide to successfully set up and run your campaign.
New to BetterMerge? Start free — 50 emails/day, no credit card. Questions? Contact support.
BetterMerge is an independent product not affiliated with, endorsed by, or connected to Google LLC. Gmail, Google Sheets, Google Workspace, and Google Workspace Marketplace are trademarks of Google LLC.