Beginner's Guide to Sending Email Campaigns with BetterMerge
Introduction
Section titled “Introduction”In this article, you’ll learn how to send your first mail merge campaign using BetterMerge (formerly Mailway Mail Merge). This step-by-step guide will walk you through setting up your contact list, creating a campaign, and tracking email performance.
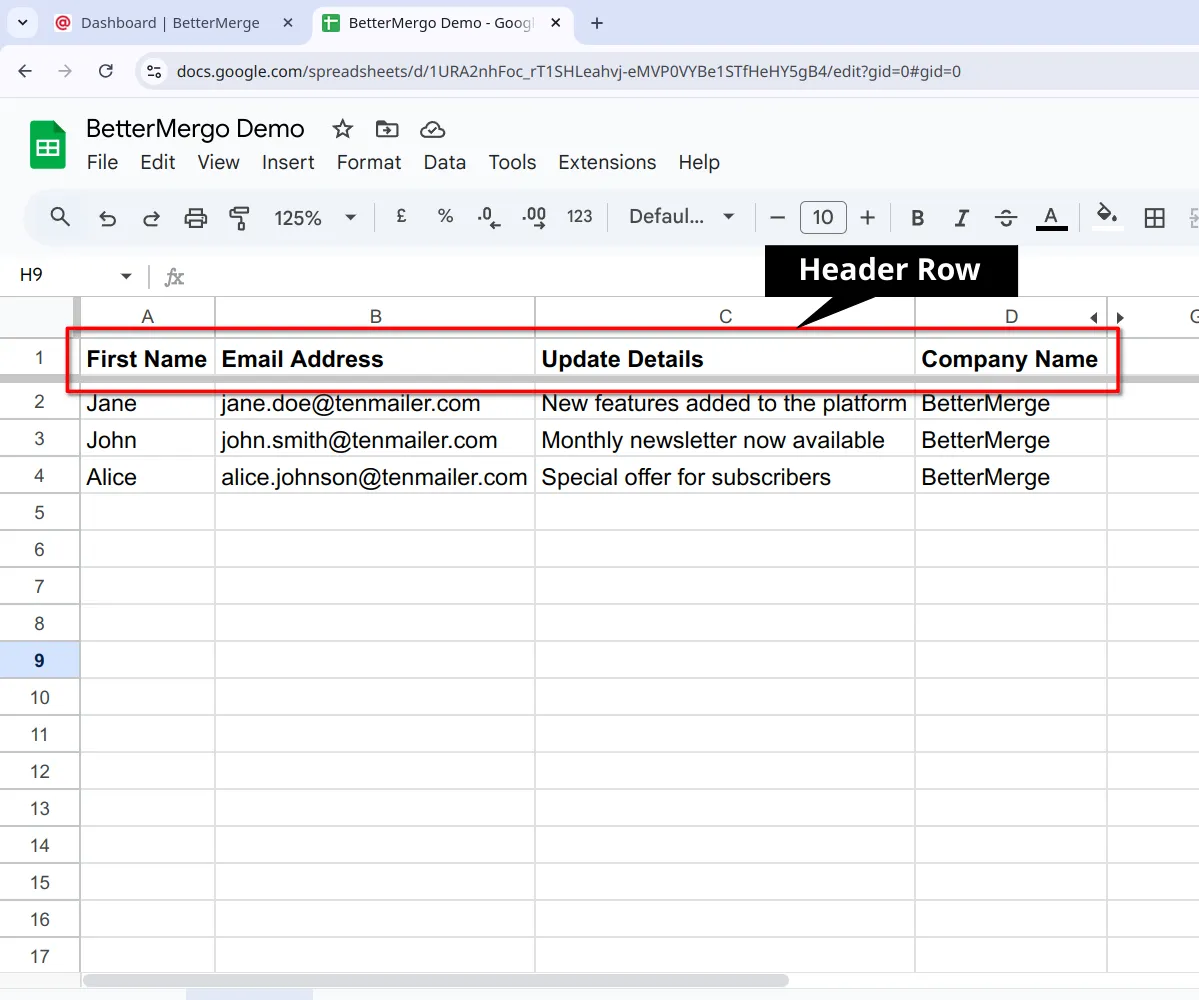
Step 1: Prepare Your Contact List in Google Sheets
Section titled “Step 1: Prepare Your Contact List in Google Sheets”The first step is to prepare your contact list in Google Sheets.
Step 2: Log In to the Web Dashboard or Open the Google Sheets Add-On
Section titled “Step 2: Log In to the Web Dashboard or Open the Google Sheets Add-On”You can access BetterMerge in two ways:
- The Web Dashboard: app.bettermerge.com
- The Google Sheets Add-On: Mailway Mail Merge
Choose whichever option suits you best.
For detailed guides, refer to:
Step 3: Create a New Campaign
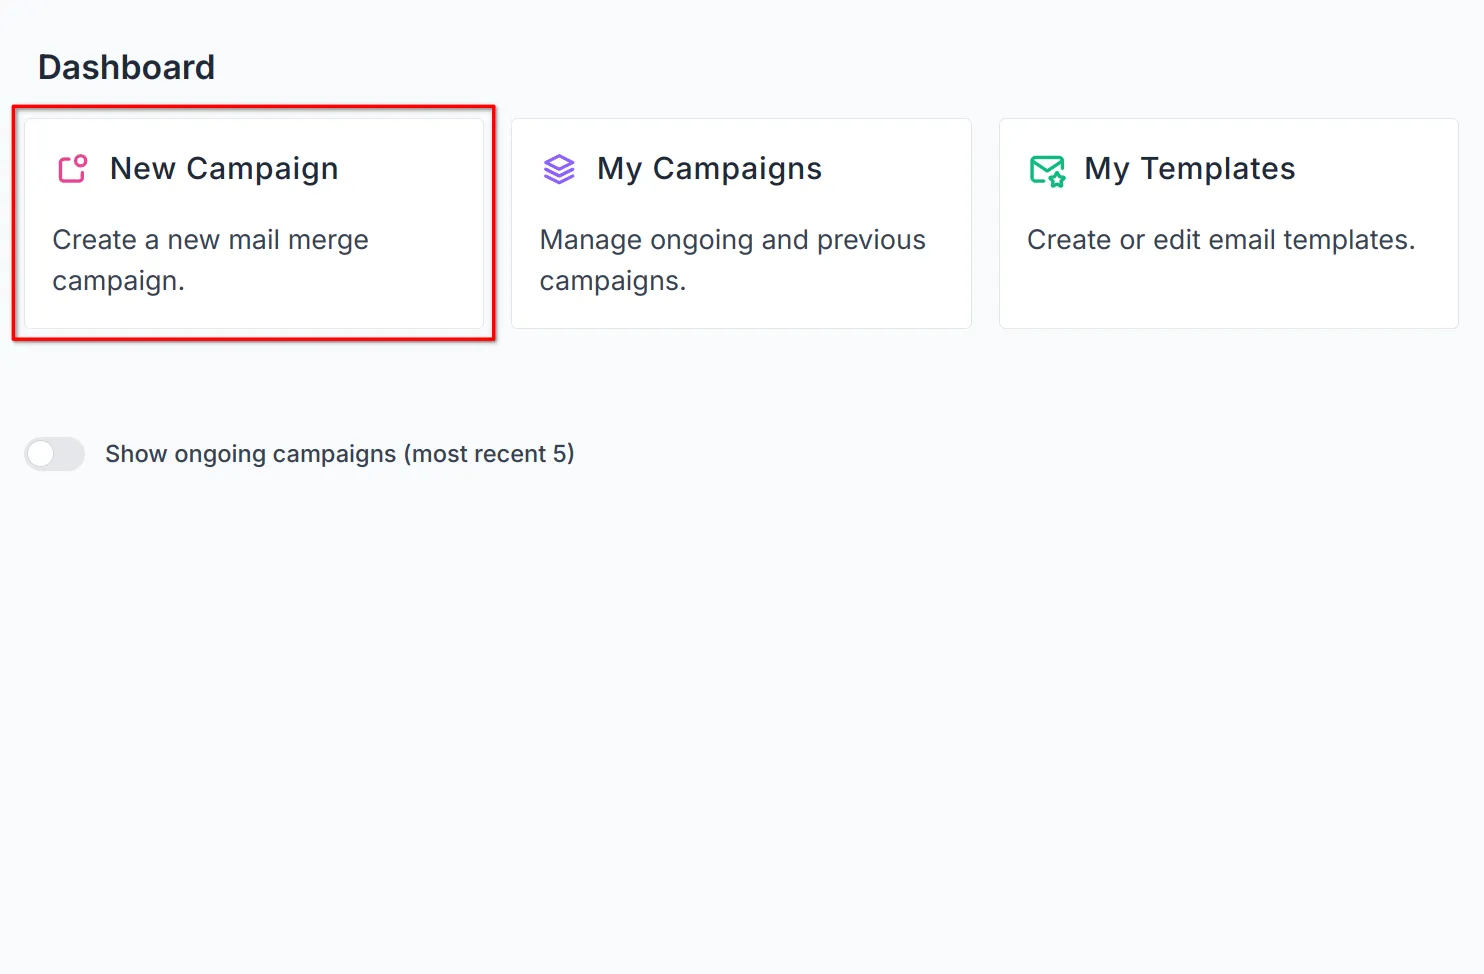
Section titled “Step 3: Create a New Campaign”From the Dashboard page, click on New Campaign.
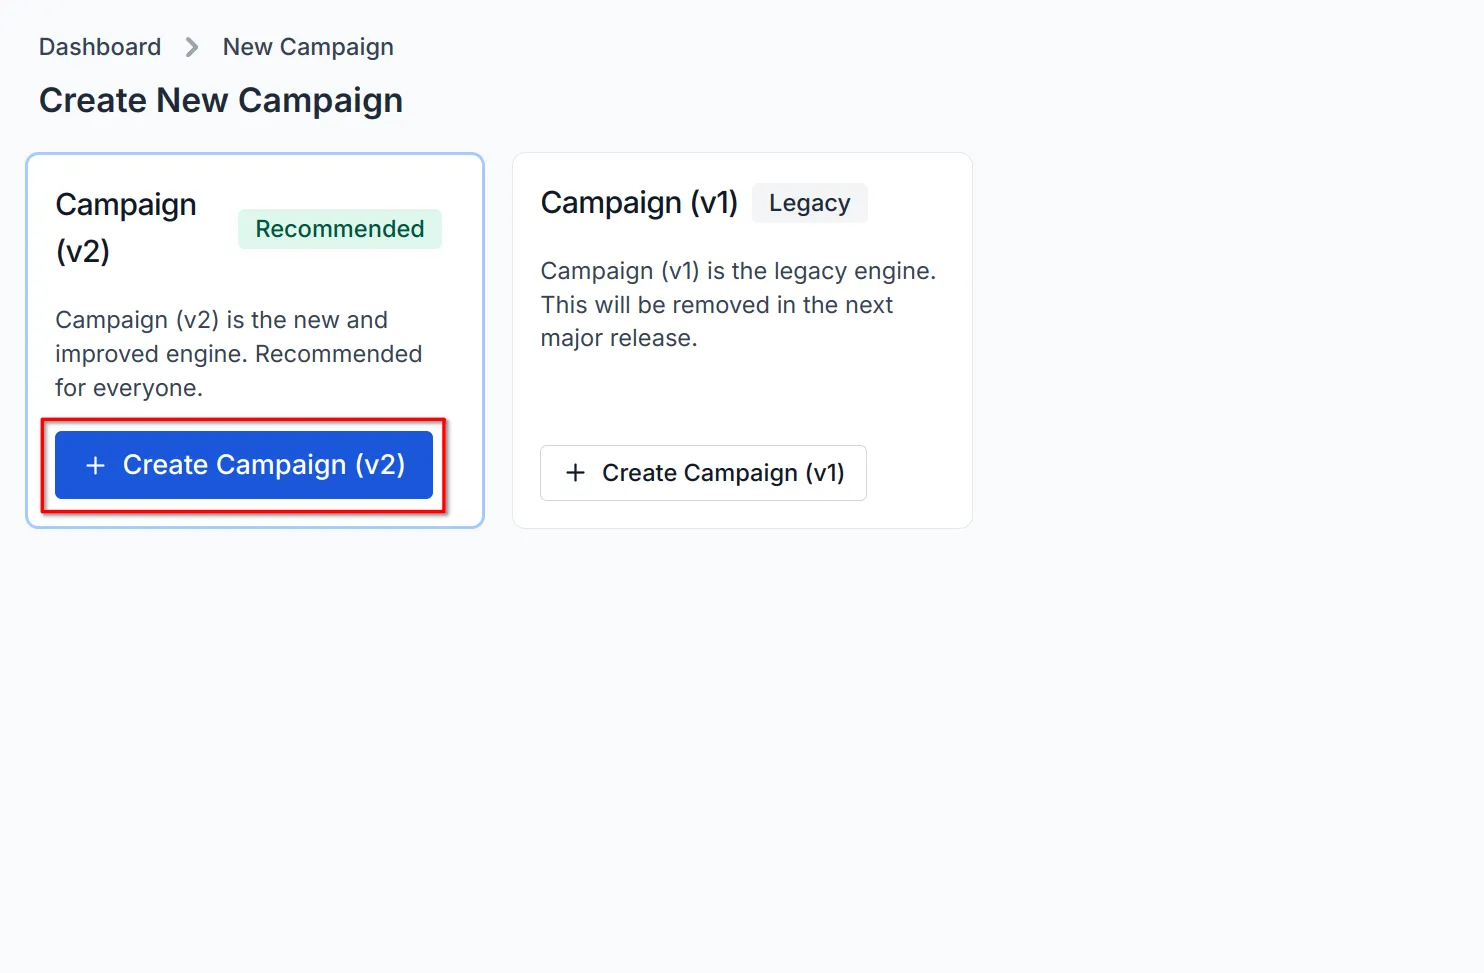
Next, click on the Create Campaign (v2) button.
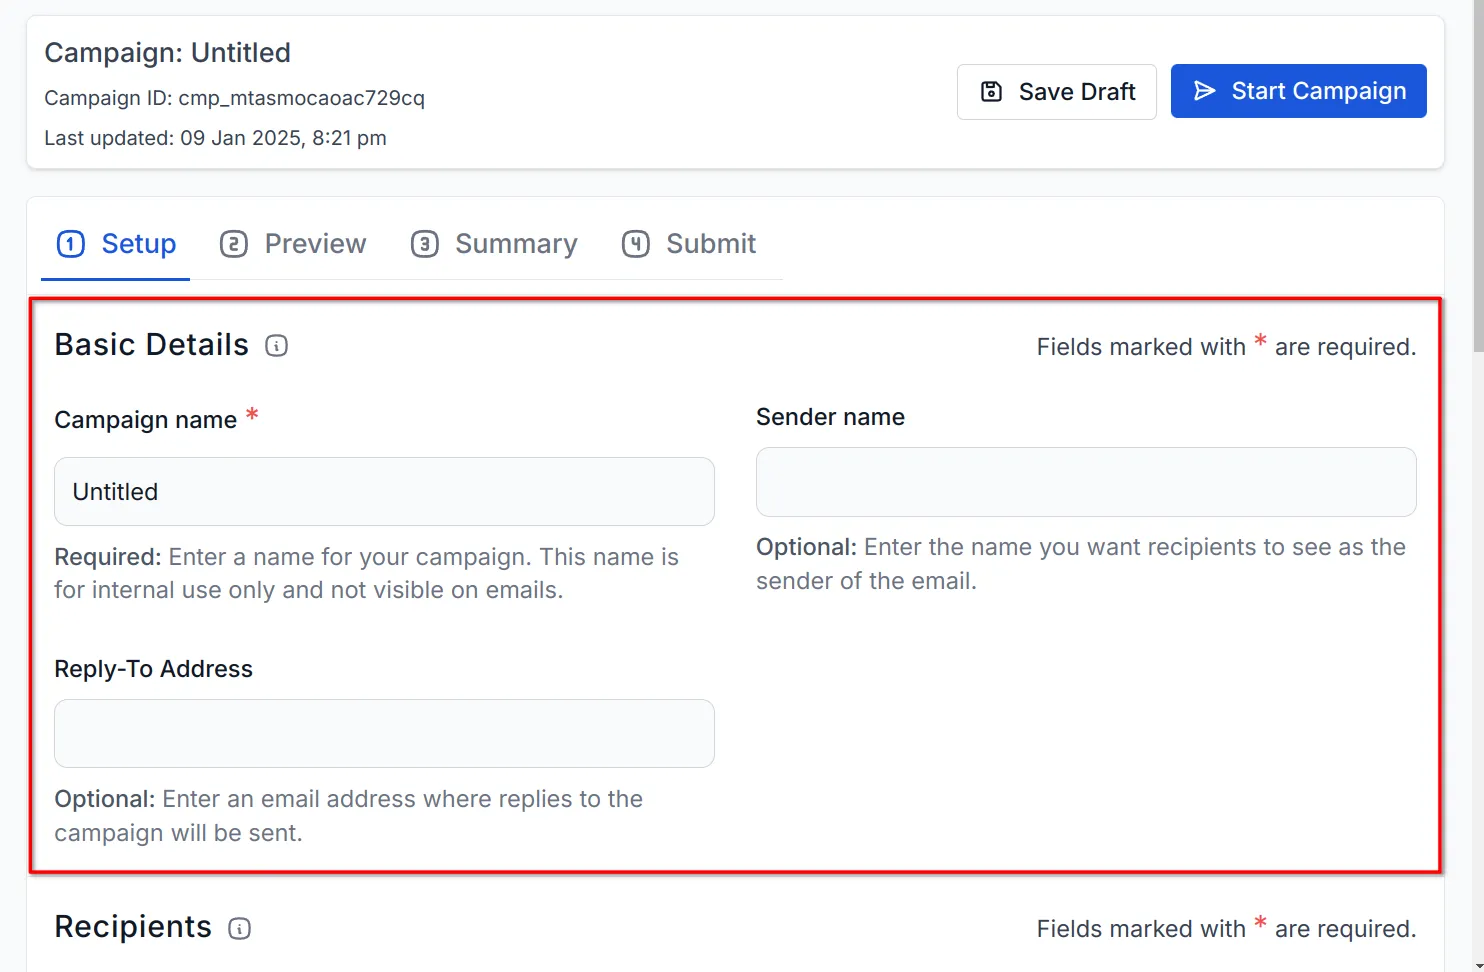
This will open the campaign editor page, where you can fill out details to configure your campaign.
Basic Details
Section titled “Basic Details”In this section, you can provide the following details:
- Campaign Name (required): A name to help you identify the campaign (only you will see this).
- Sender Name (optional): The name that appears as the sender in your emails.
- Reply-To Address (optional): An email address where recipients can reply.
Recipients
Section titled “Recipients”In this section, you’ll select the Google Sheets that contains the email list (i.e. contact list).
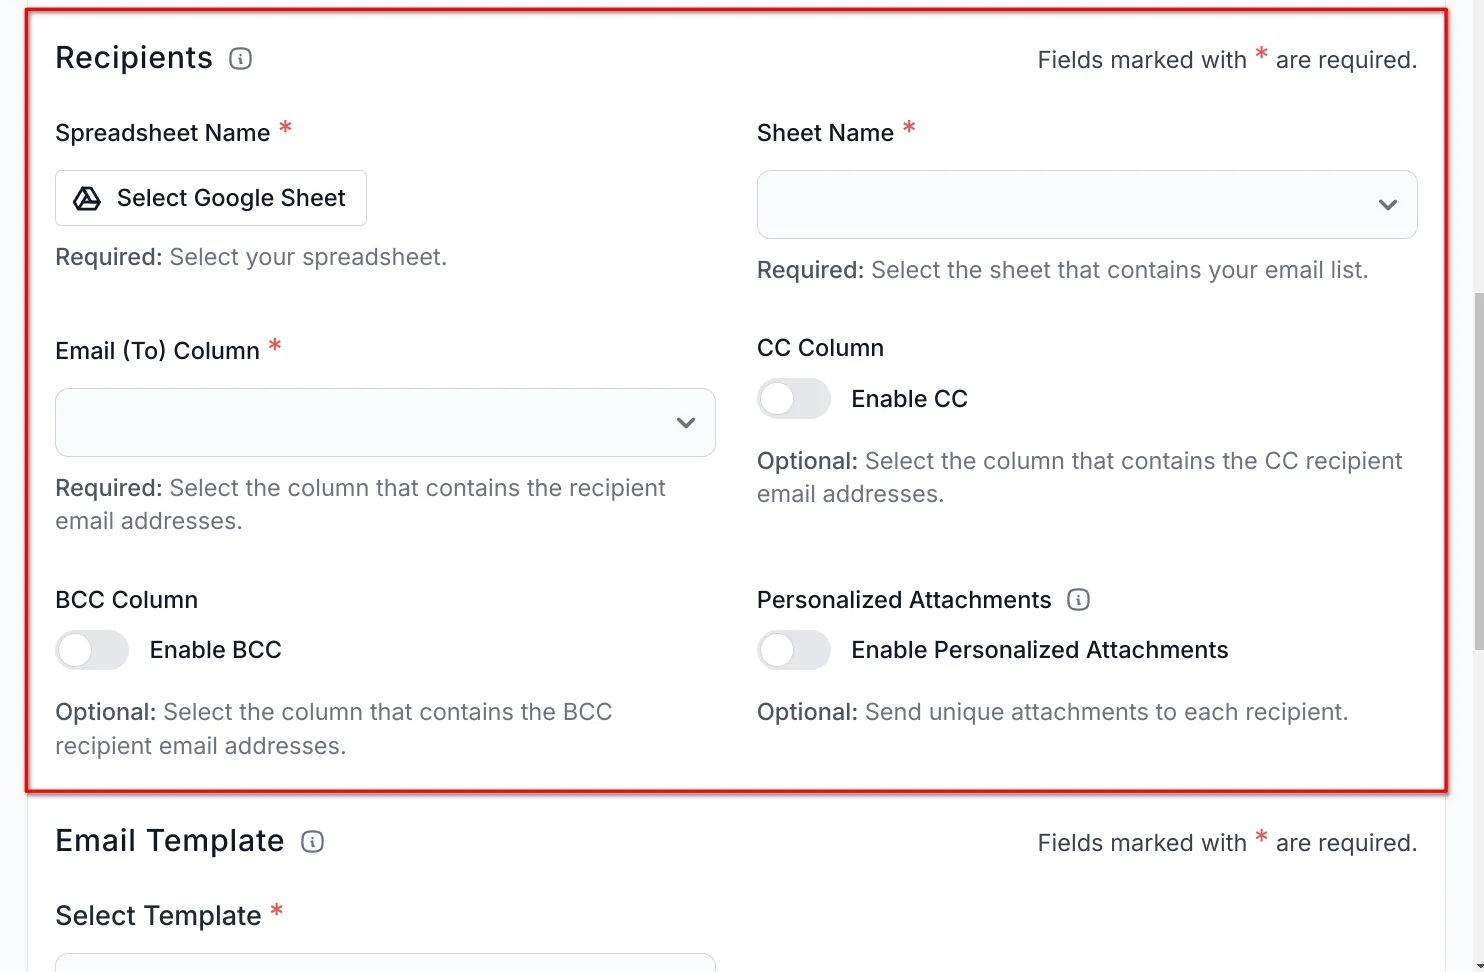
Select Google Sheets:
- Click the Select Google Sheets button to launch the Google Drive popup.
- In the Google Drive popup window, locate and select the Google Sheet that contains your email list. The sheet should have your contacts’ details like names and email addresses.
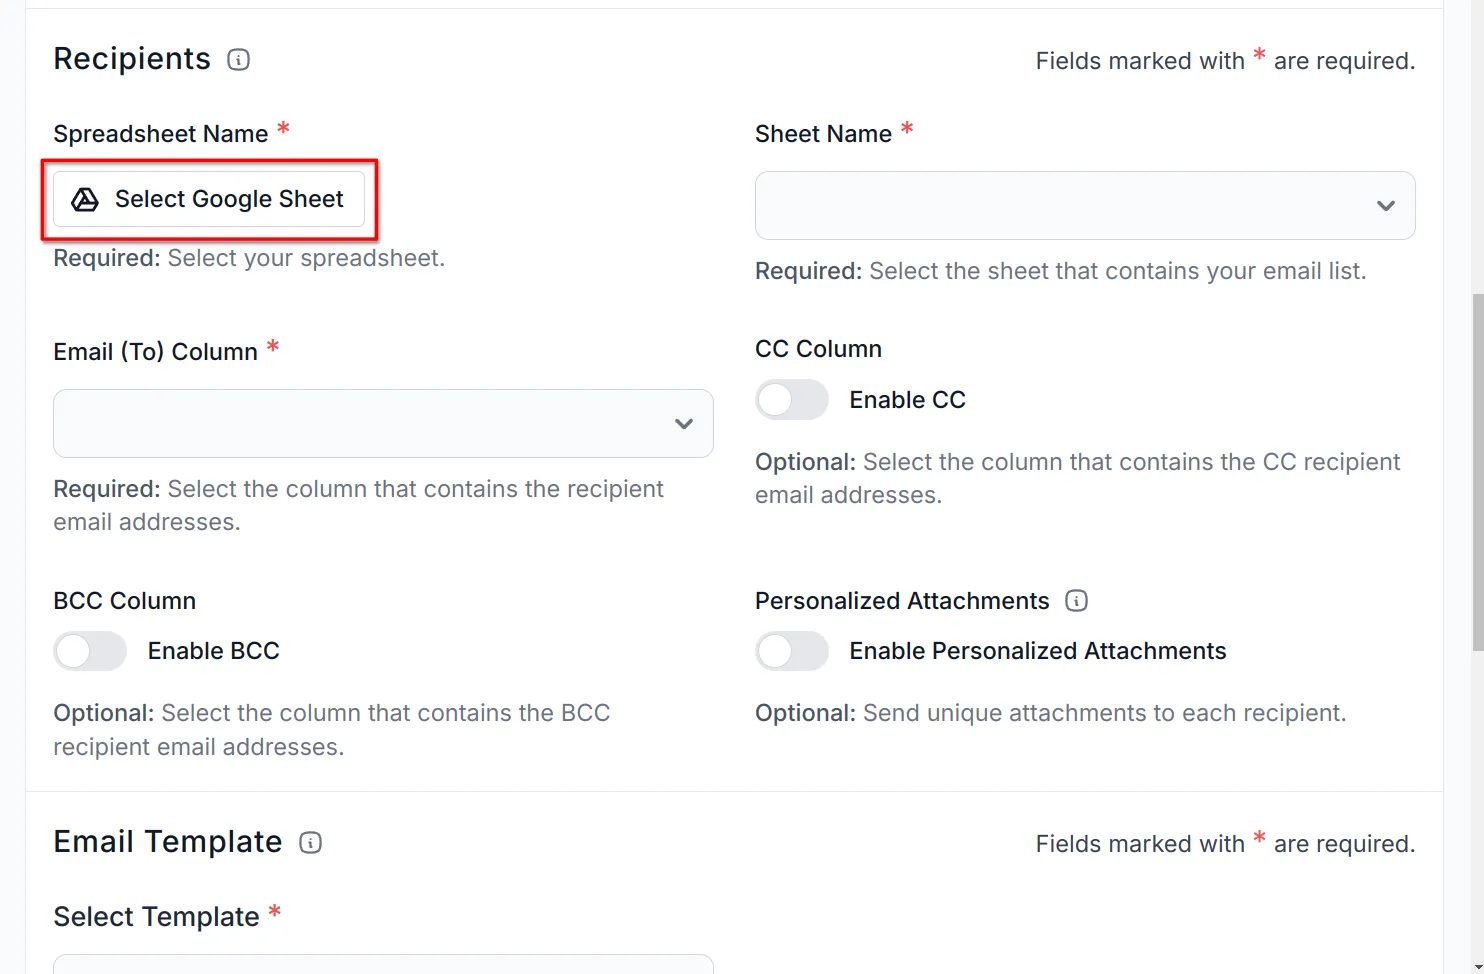

Choose the Sheet:
- Once the Google Sheet is selected, a dropdown menu will appear with the names of sheets within the document.
- Select the sheet that contains your email list.
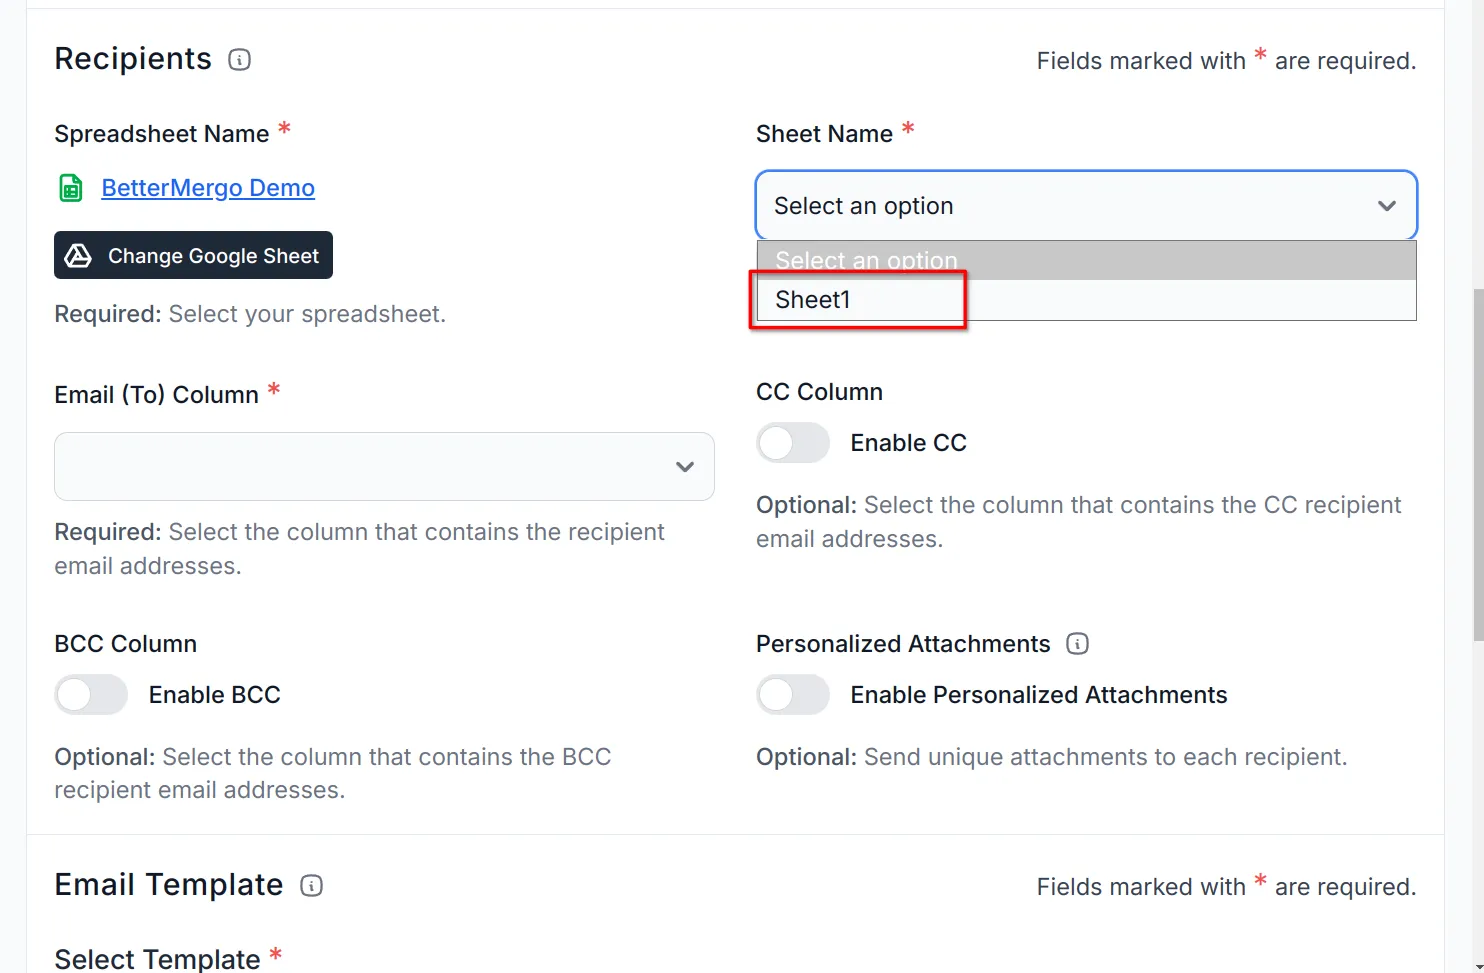
Select Email (To) Column:
- In this dropdown, select the column that contains the email addresses of your recipients.

CC Column (Optional):
- If you need to send emails with CC recipients, toggle the CC column option.
- Select the column from your sheet that contains the CC email addresses.
BCC Column (Optional):
- If you’d like to send emails with BCC recipients, toggle the BCC column option.
- Choose the column that contains the BCC email addresses from your sheet.
Personalized Attachments (Optional):
- Toggle the switch if you want to send unique attachments to each recipient.
- Read this guide to configure Personalized Attachments.
Email Template
Section titled “Email Template”In this section, you’ll select the email template. Either use an existing template or create a new one. For this tutorial, we’ll create a new email template.

Click on click here link to create a new email template.
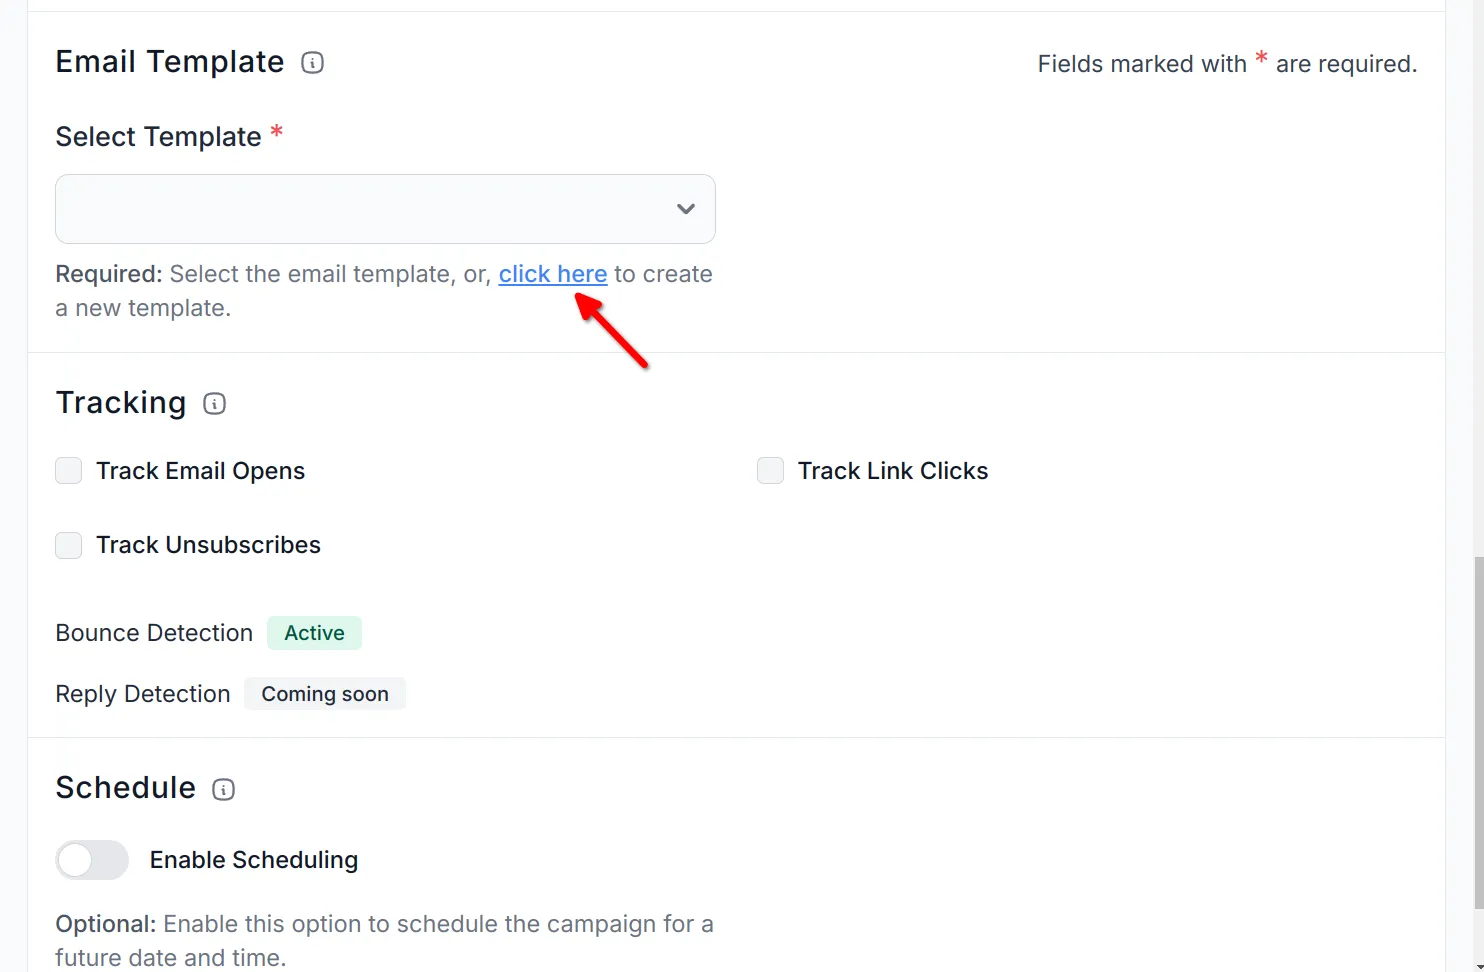
This will open the template editor page.
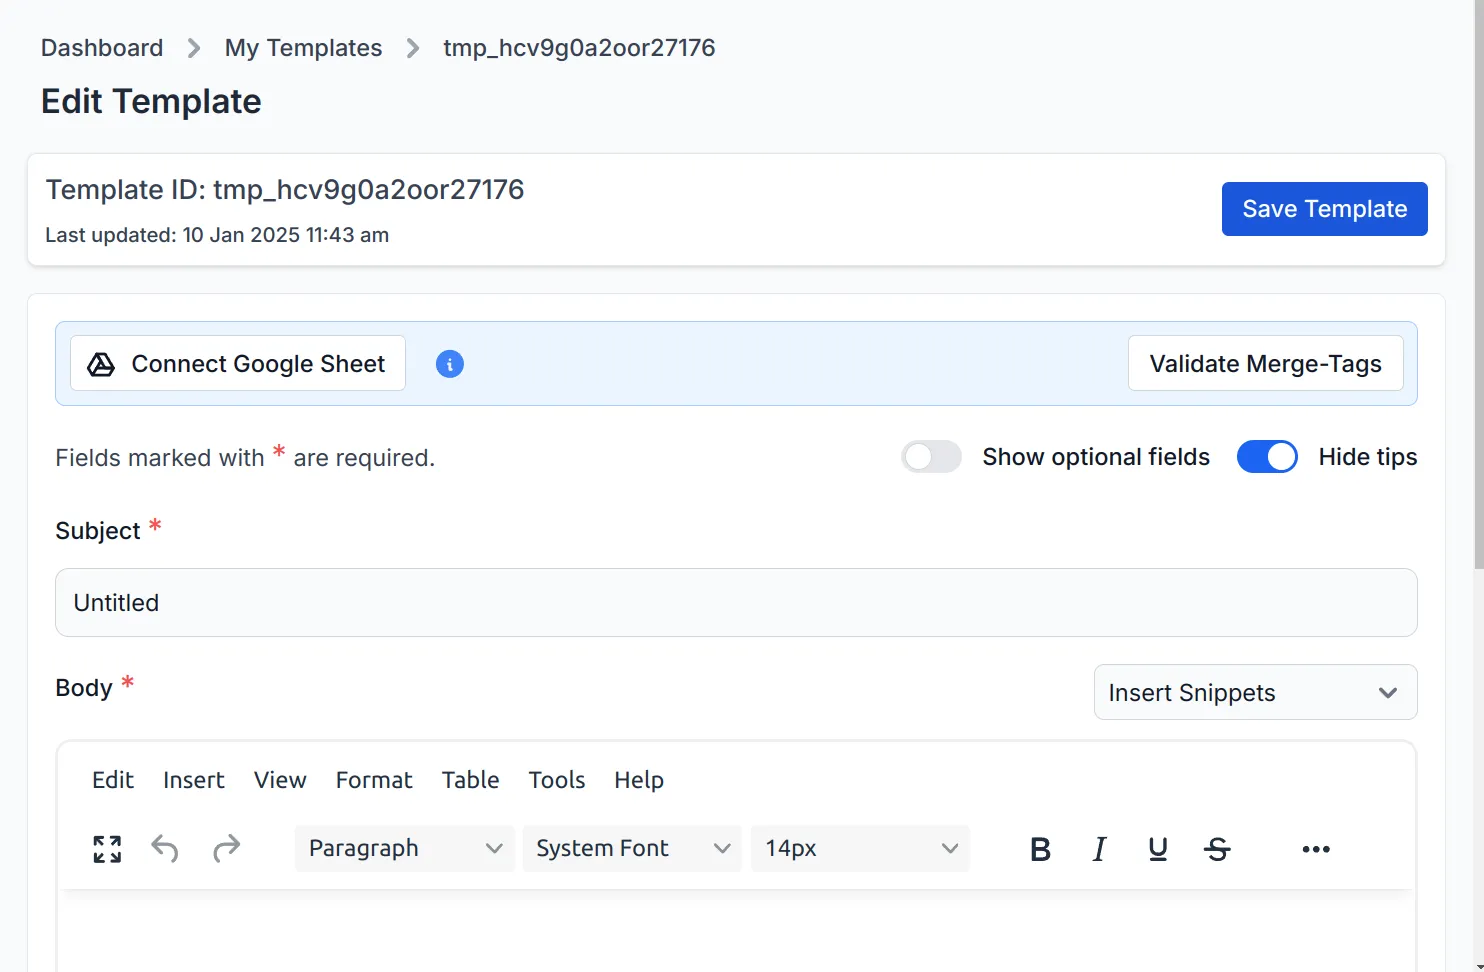
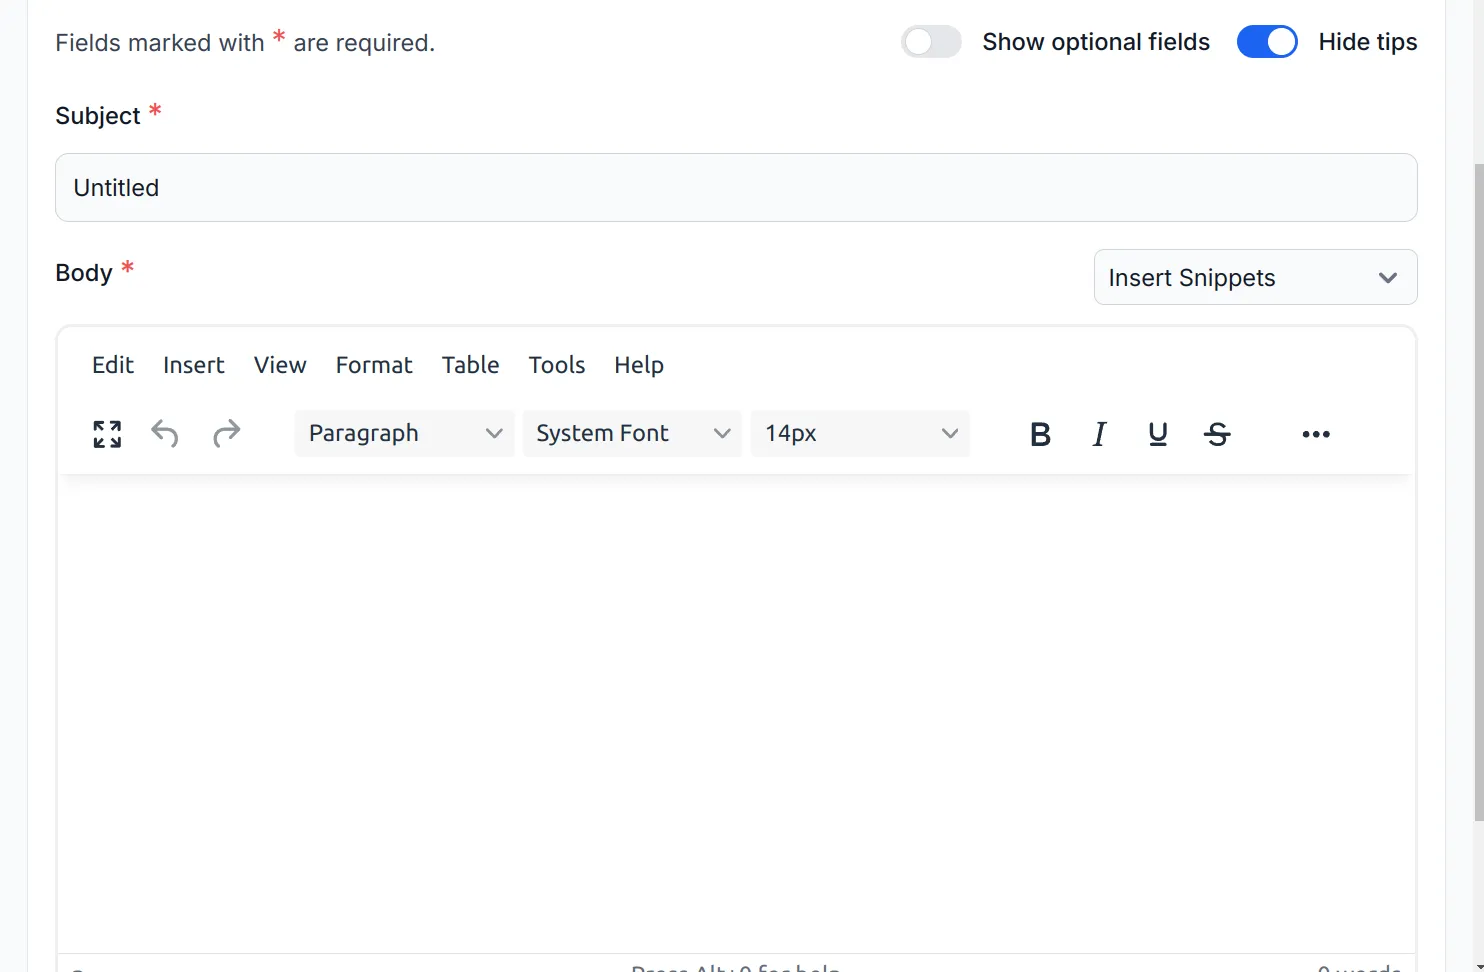
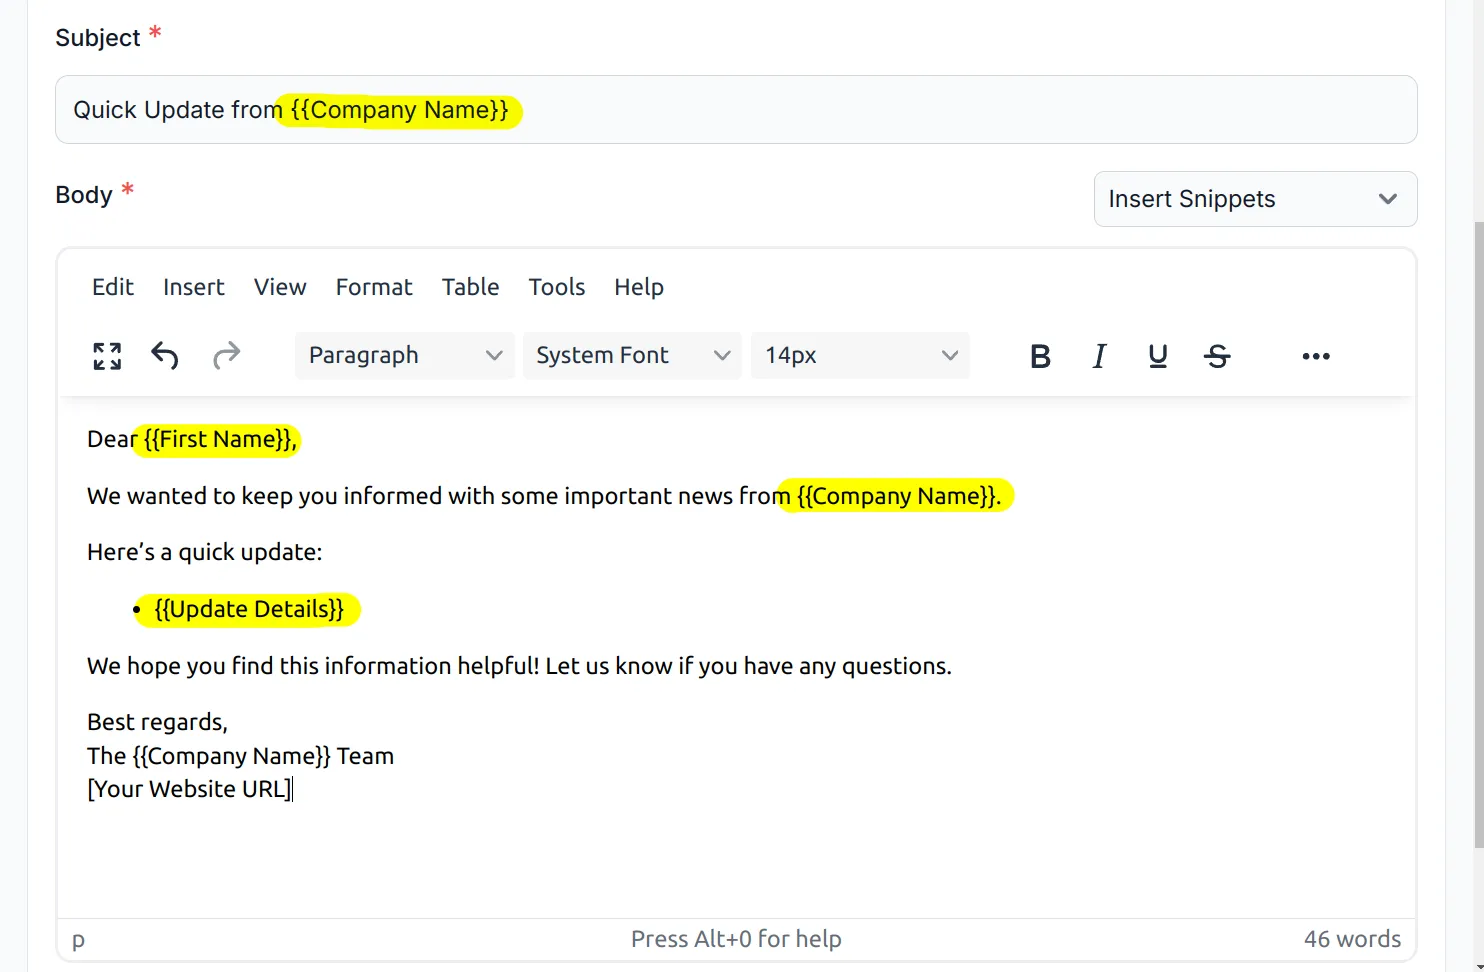
Enter the Subject line and Body of the email template.
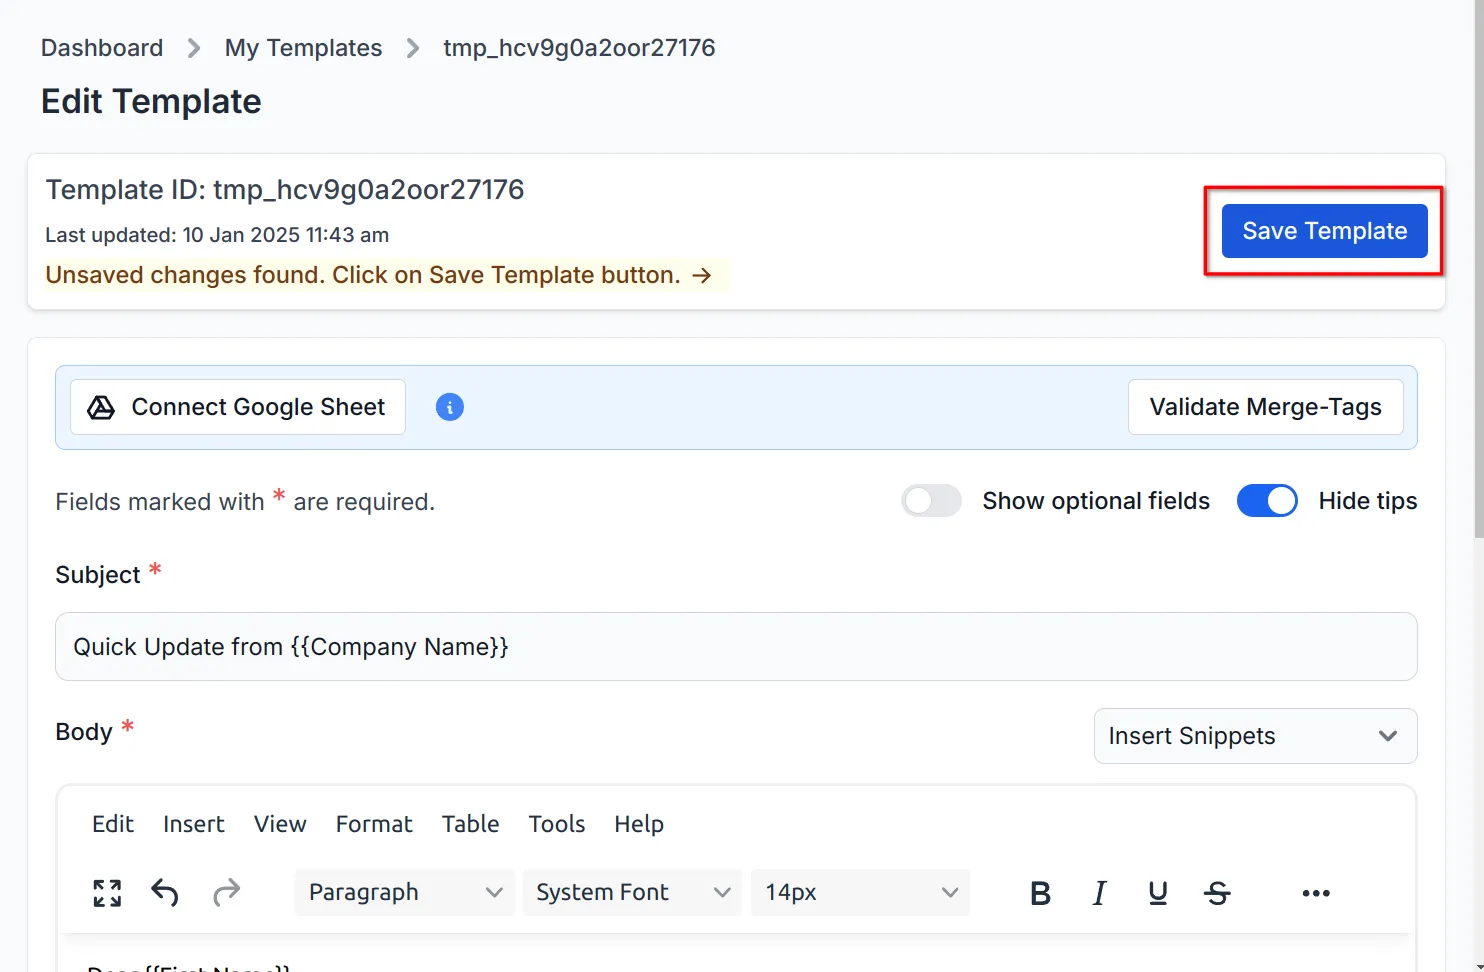
Click on the Save Template button to save the email template.
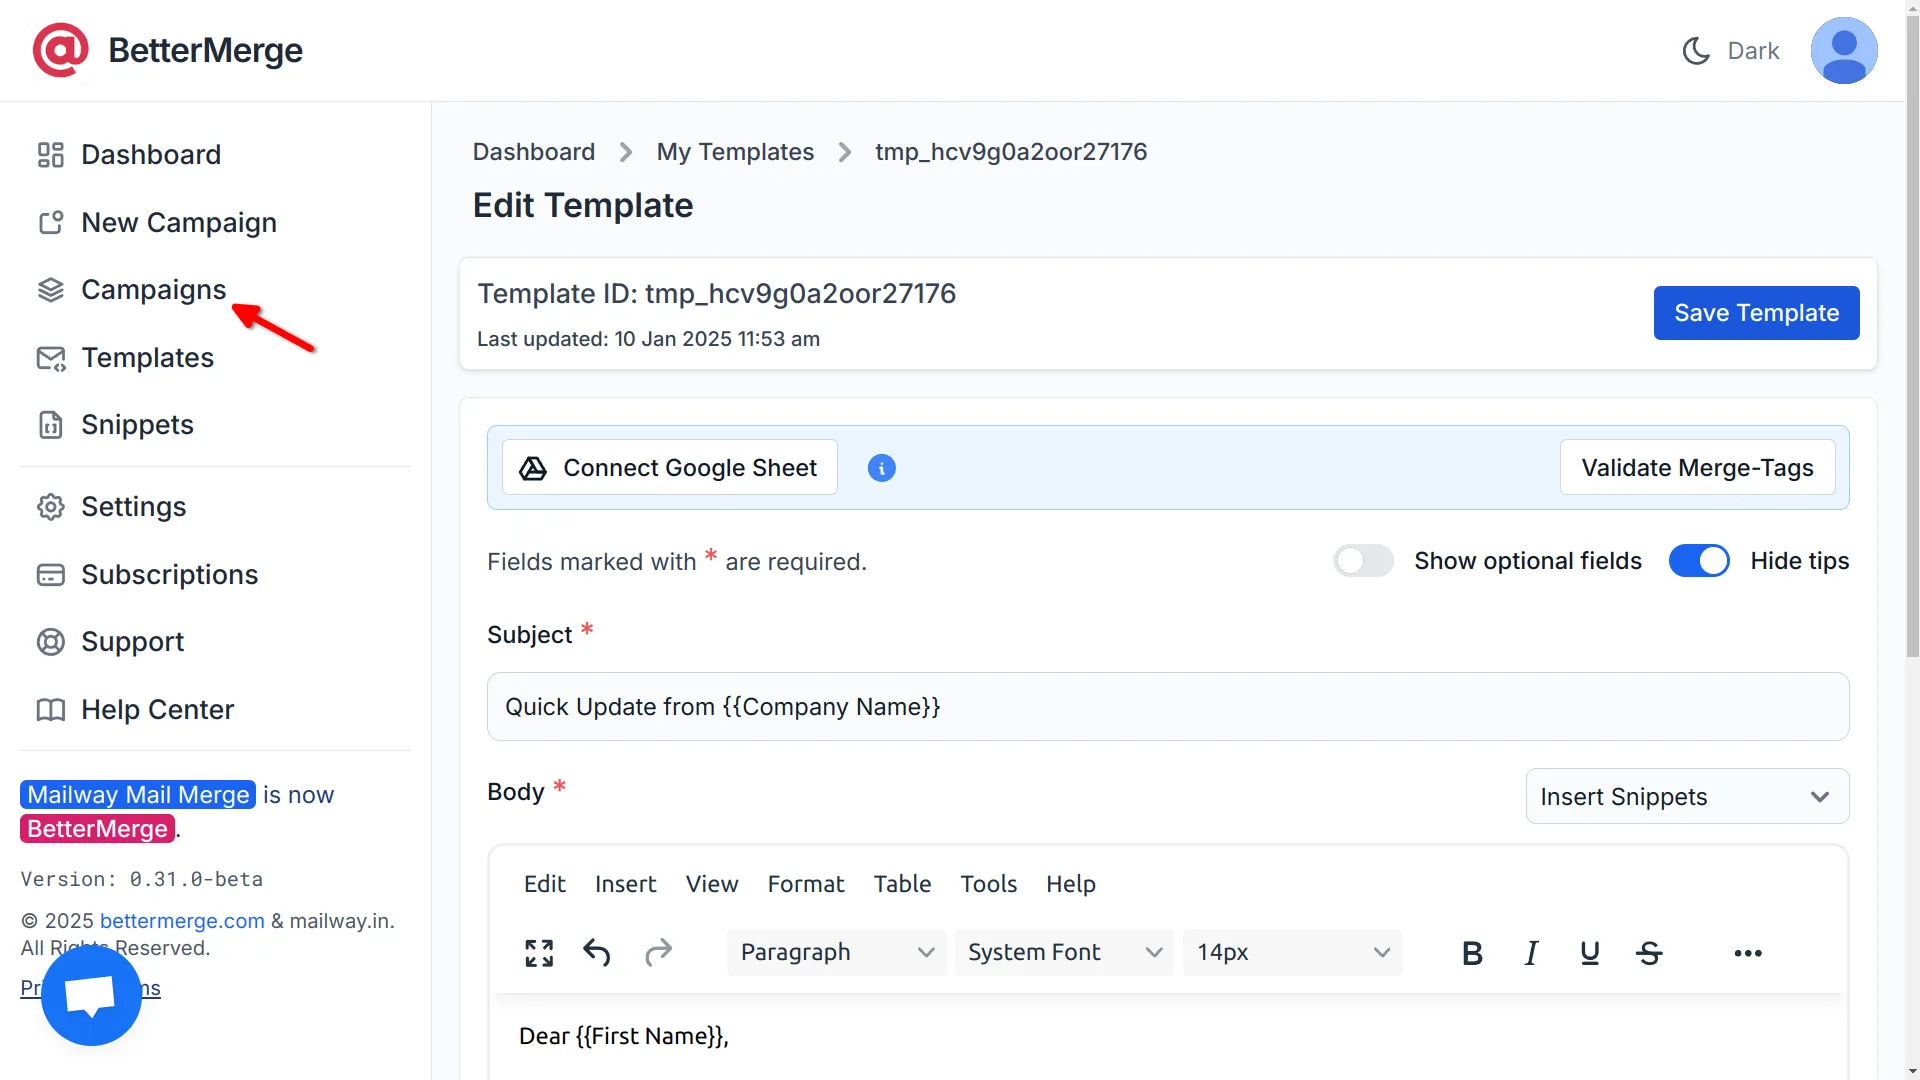
Next, click on Campaigns.
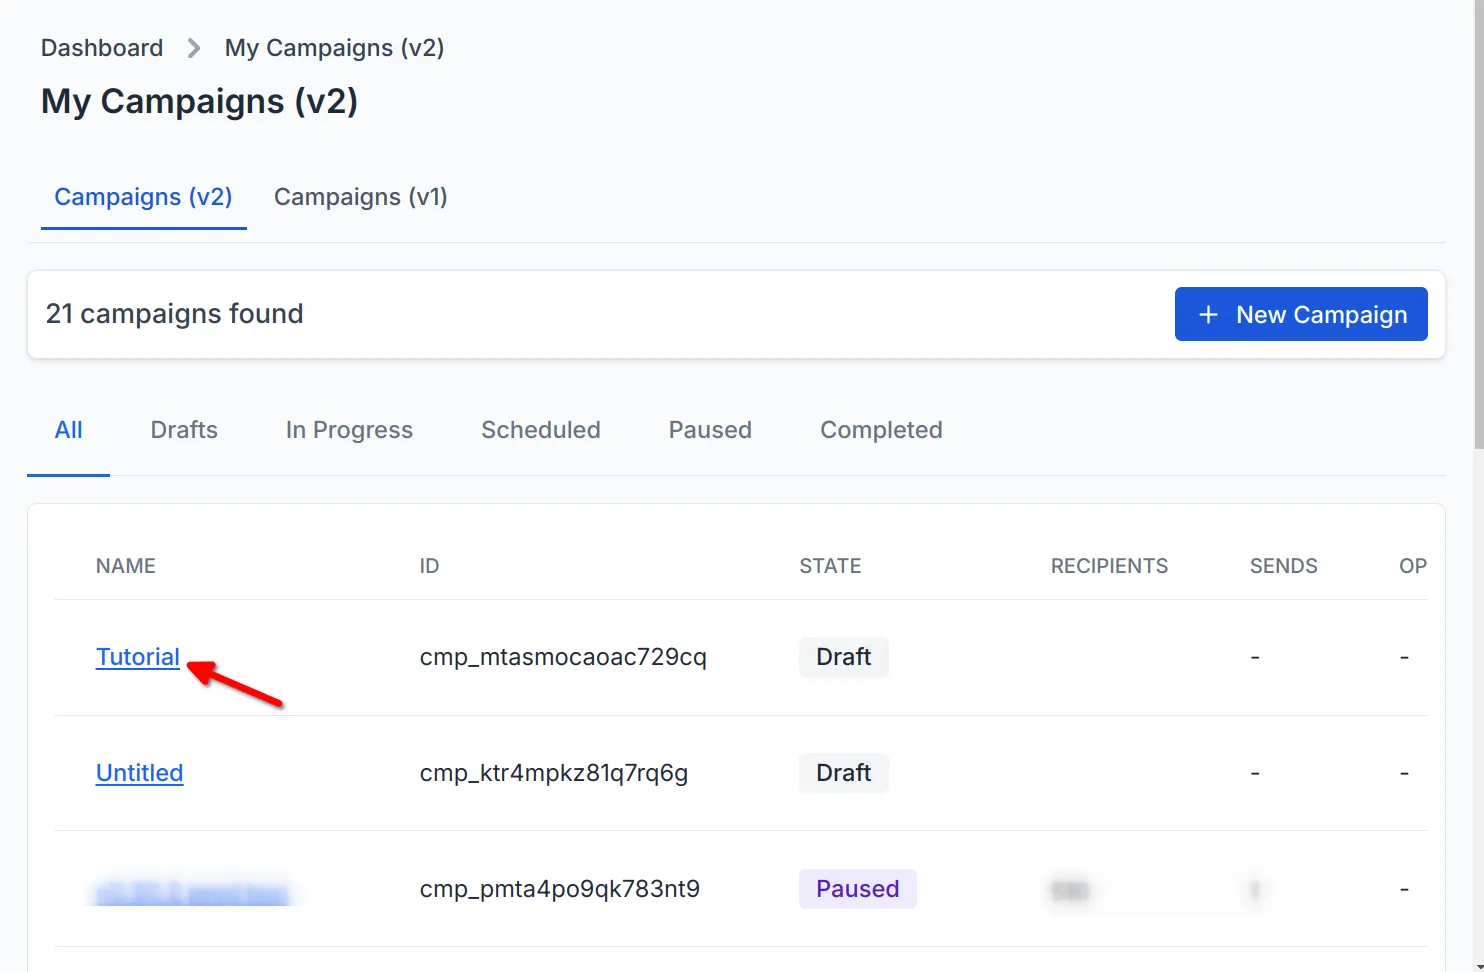
Next, click on the draft campaign you’ve just created.
Click on the Select Template dropdown and select the email template you’ve just created.

Email Tracking
Section titled “Email Tracking”The Tracking section allows you to track your emails:
- Track Email Opens: Track when recipients open your email.
- Track Link Clicks: Track which links were clicked along with time and location information of the recipient.
- Track Unsubscribes: Easily add unsubscribe links to your emails and track unsubscribes.
All options are optional—enable only the ones relevant to your campaign.

Preview Emails
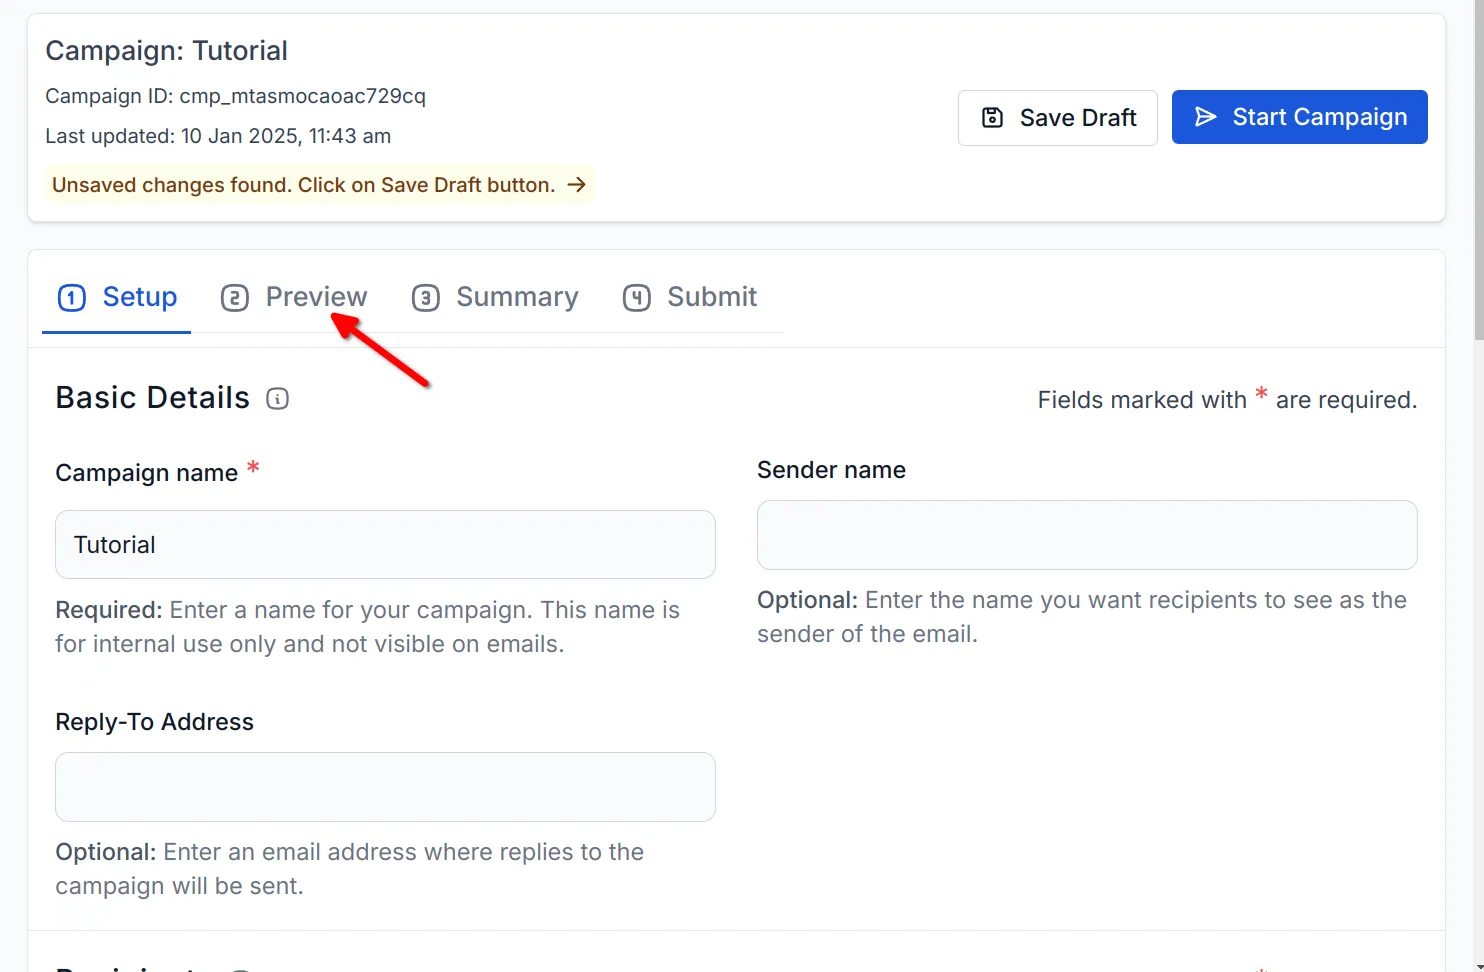
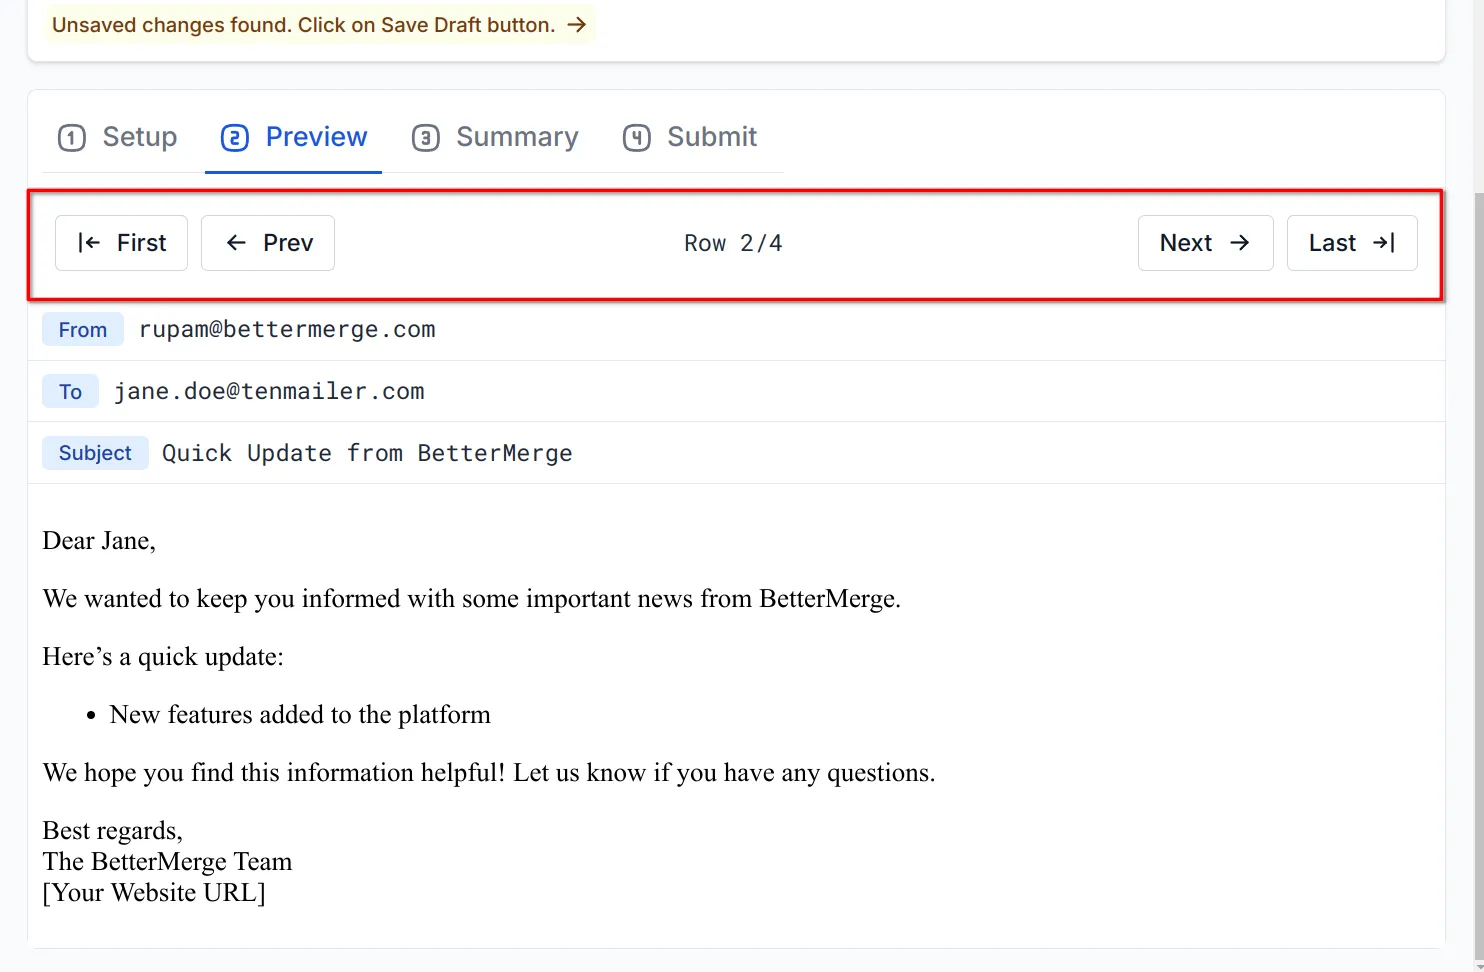
Section titled “Preview Emails”Next, go to Preview tab to preview individual emails before sending.
Use the Next and Prev buttons to cycle through individual email previews.
View Summary
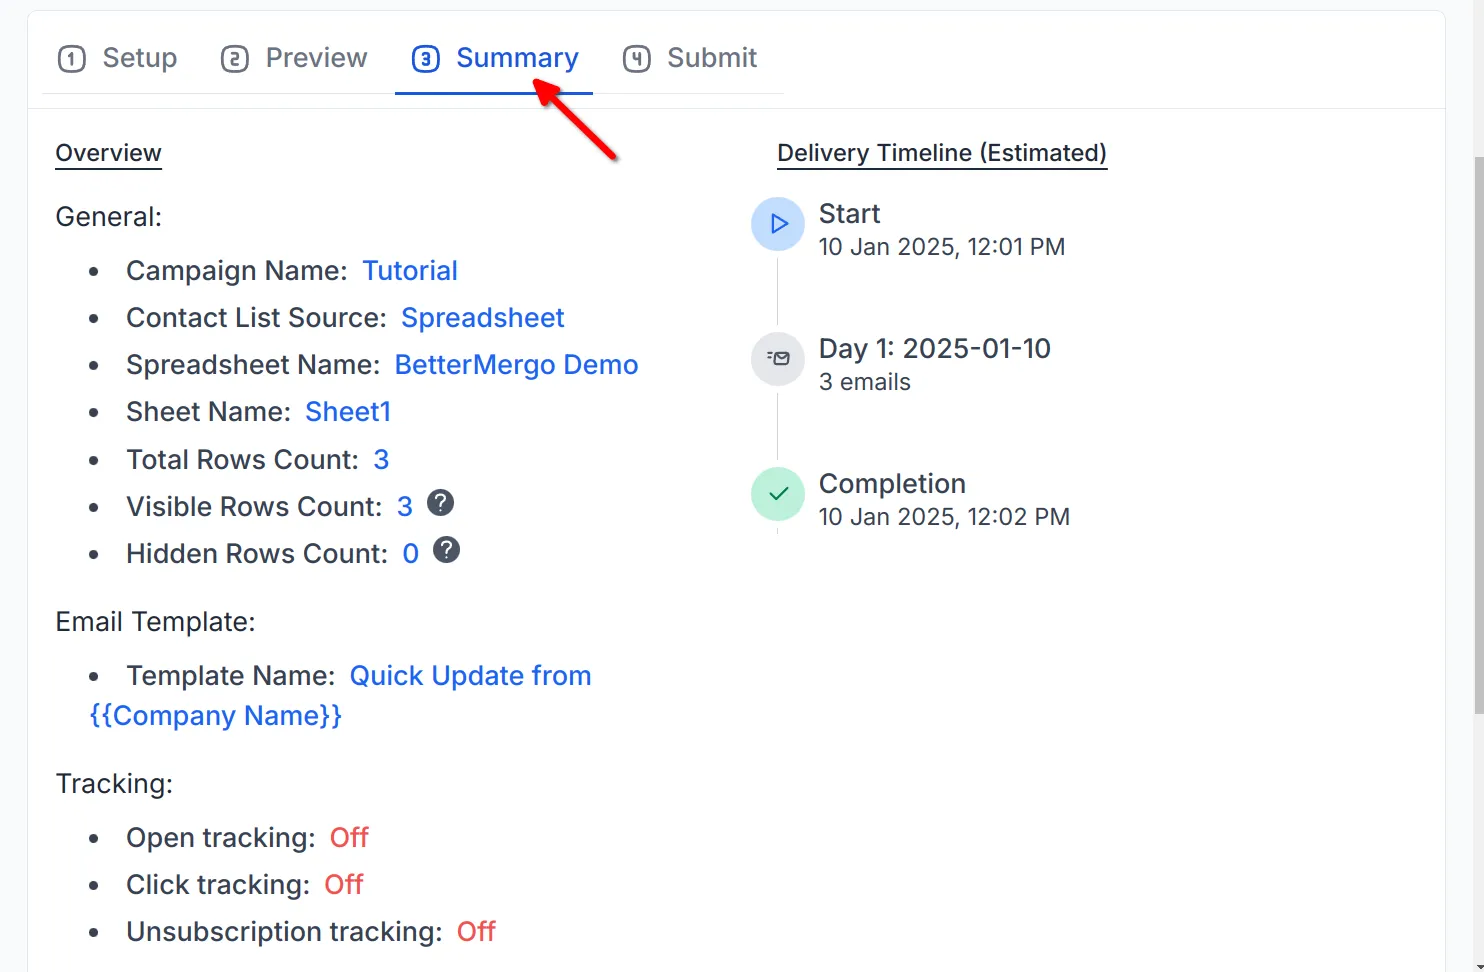
Section titled “View Summary”Next, go to Summary tab to view a summary of your campaign before sending.
Submit the Campaign
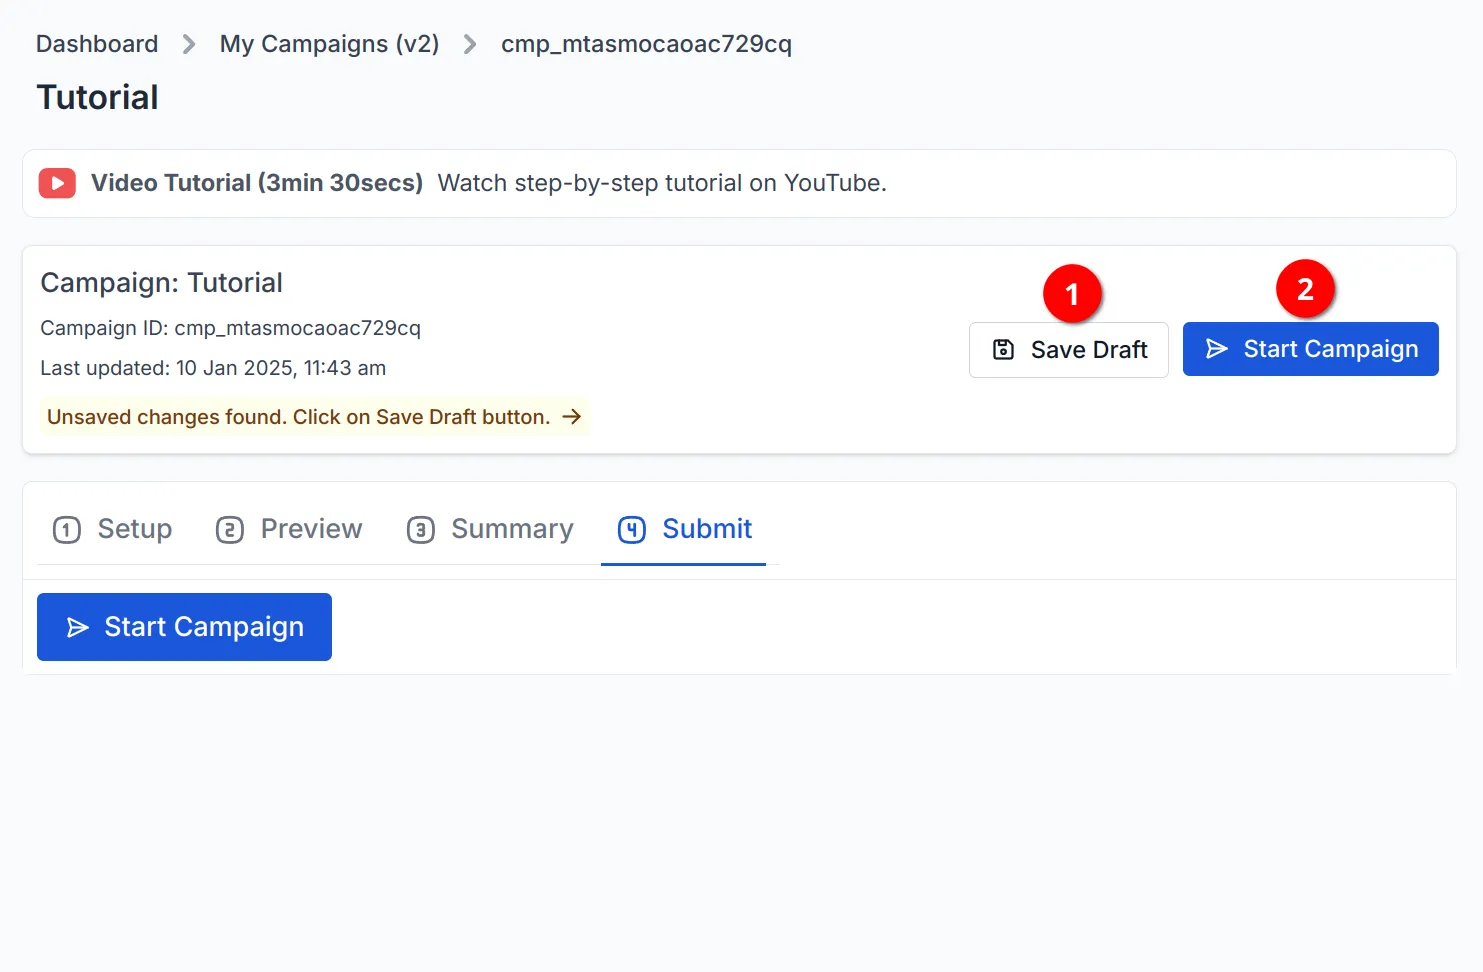
Section titled “Submit the Campaign”Finally, go to Submit tab. Next, click on Save Draft to the save the campaign as draft and then click on Start Campaign to initiate your campaign.
Step 4: View Campaign Report
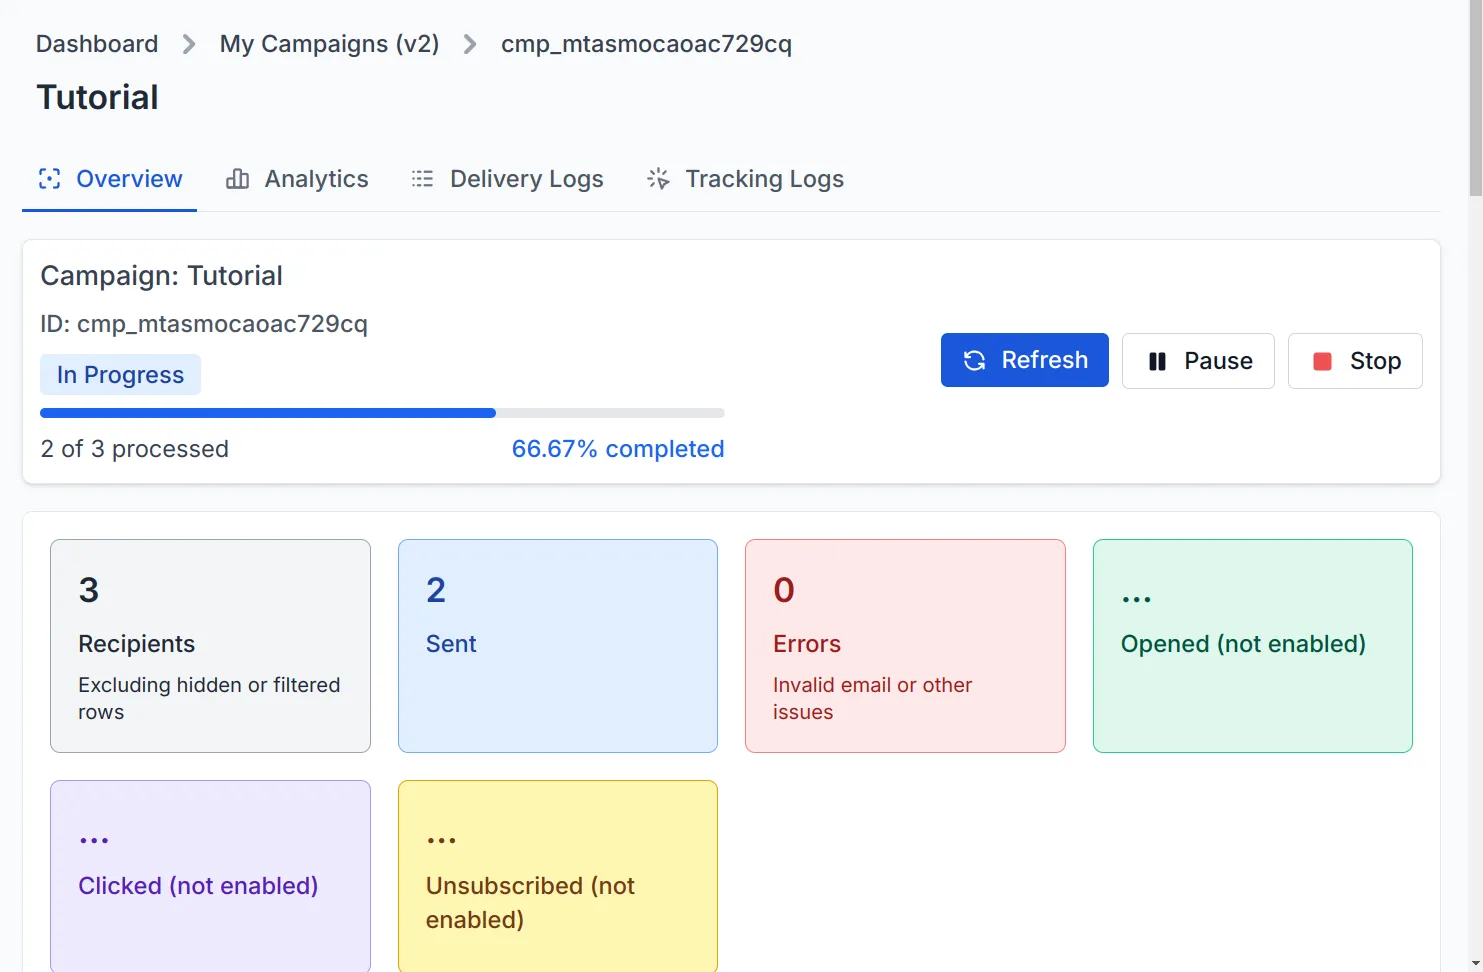
Section titled “Step 4: View Campaign Report”The Campaign Report page will open automatically once the campaign is submitted. You can use the available action buttons: Refresh to update the report, Pause to temporarily stop the campaign, and Stop to halt the campaign permanently.
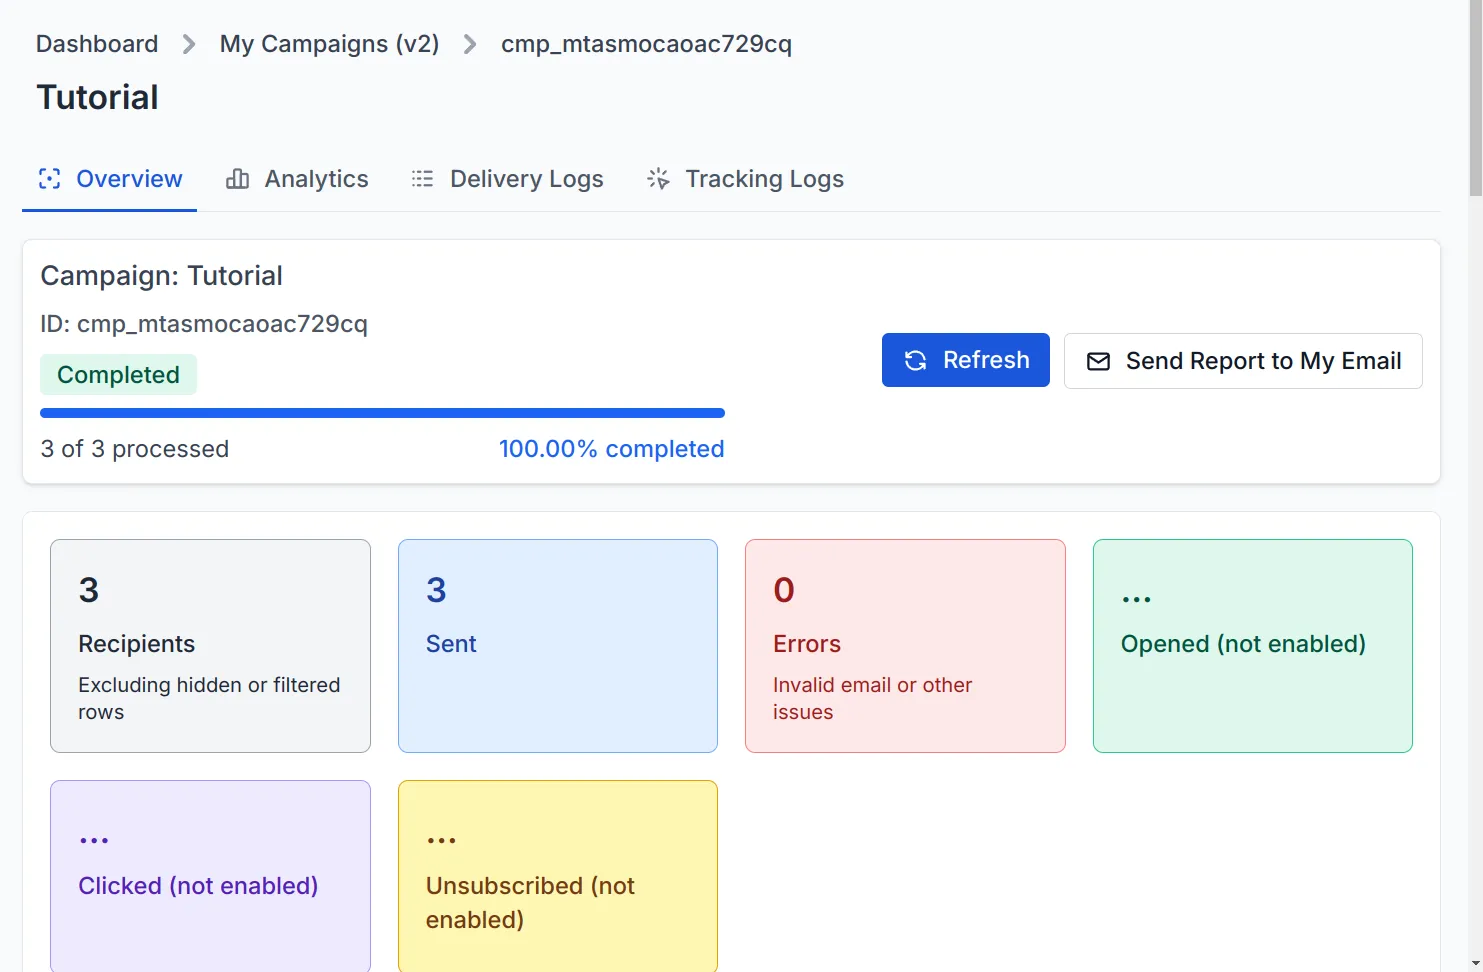
Once the campaign is completed, you’ll receive a Campaign Report Email. You can also click the Send Report to My Email button at any time to get an updated report.
Additionally, two new columns will be added to your Google Sheet as soon as the campaign starts:
- STATUS: Displays the status of each email, such as SENT, OPENED, CLICKED, etc.
- METADATA: Shows timestamps and message details.
The Google Sheets status columns are updated in real-time along with tracking information.

Next Steps
Section titled “Next Steps”Congratulations!
You have successfully sent your first mail merge campaign using BetterMerge. Now that you’ve completed your first campaign, take a moment to explore the full capabilities of BetterMerge to maximize your results. Check out the other documentation sections for more tips, advanced features, and best practices to enhance your experience.
Conclusion
Section titled “Conclusion”Congratulations! You’ve successfully sent your first mail merge campaign using BetterMerge. Now that you’re familiar with the basics, explore other features to enhance your email outreach.
For further guidance, check out:
Happy sending!
BetterMerge is an independent product not affiliated with, endorsed by, or connected to Google LLC. Gmail, Google Sheets, Google Workspace, and Google Workspace Marketplace are trademarks of Google LLC.