Add Personalized Attachments
Introduction
Section titled “Introduction”In this article, you will learn how to send personalized attachments using BetterMerge. This feature allows you to include unique files for each recipient directly from Google Sheets, improving email personalization and automation.
Step 1: Prepare Your Google Sheets
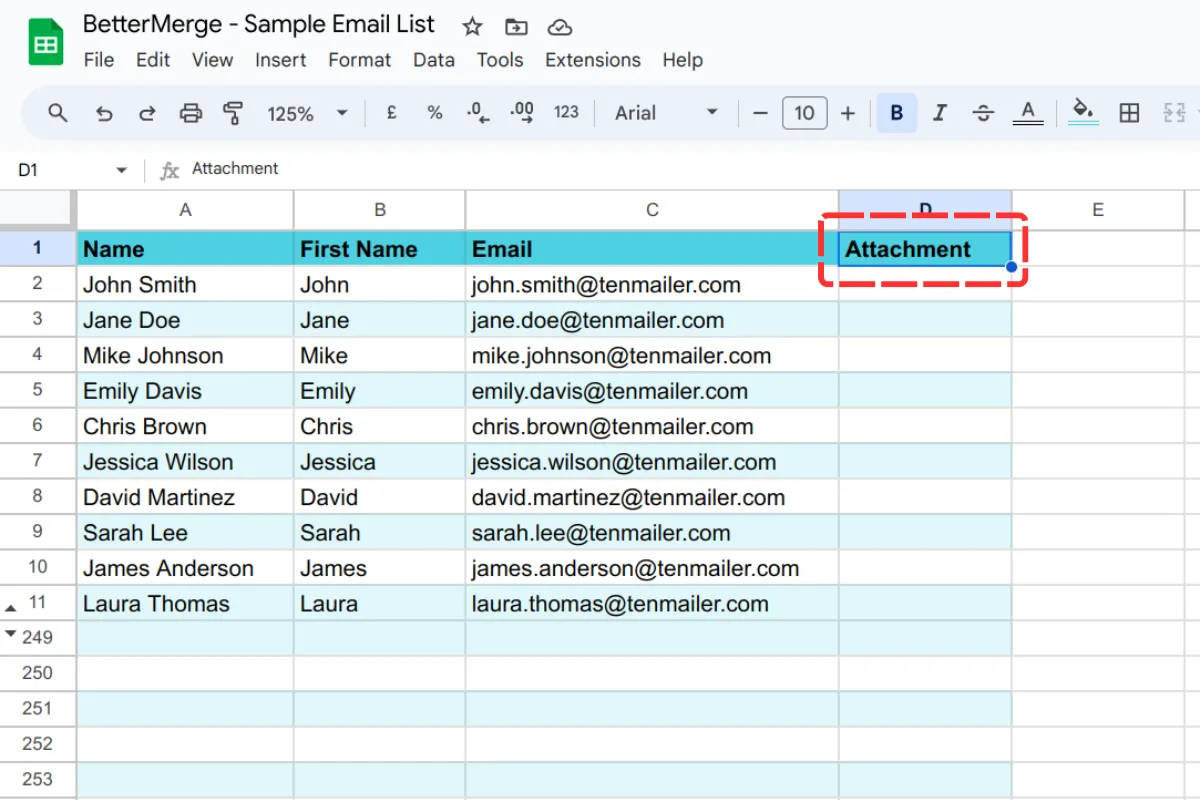
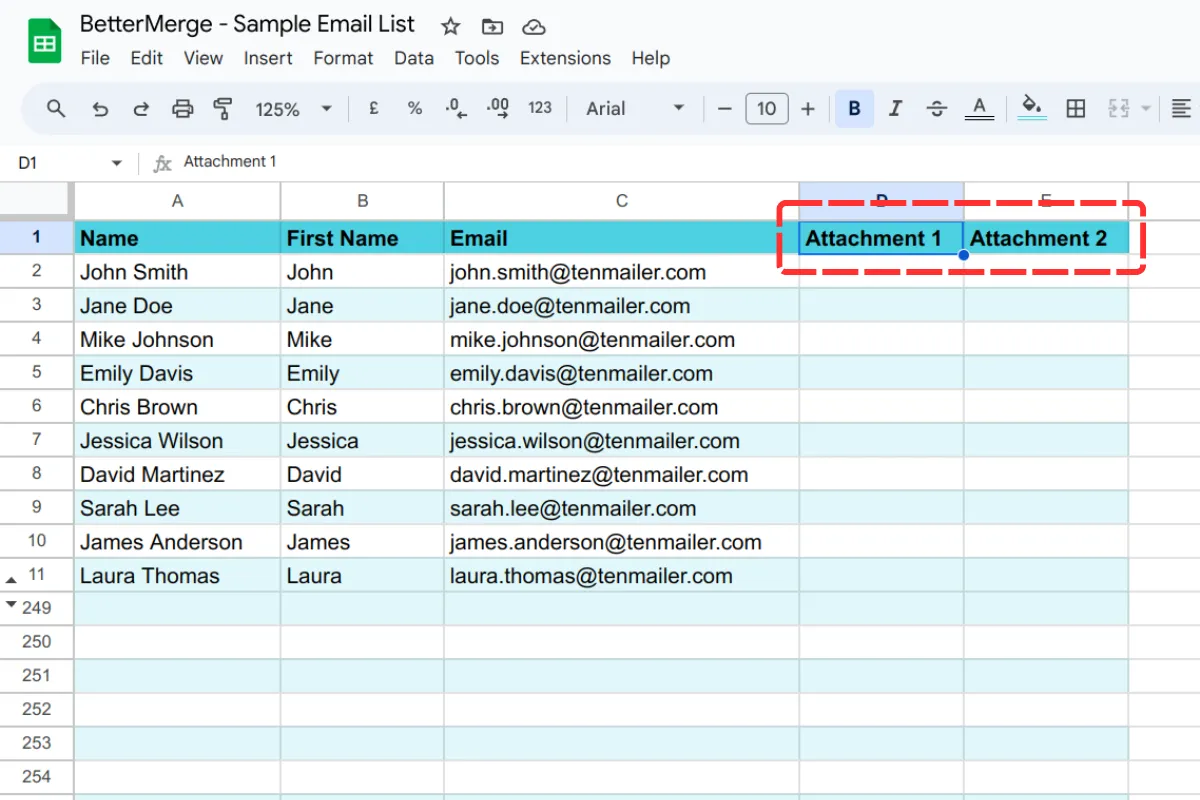
Section titled “Step 1: Prepare Your Google Sheets”Set up a Google Sheet with a dedicated column for attachments:
- For a single attachment, create a column named “Attachment.”
- For multiple attachments, add columns labeled “Attachment 1,” “Attachment 2,” etc.
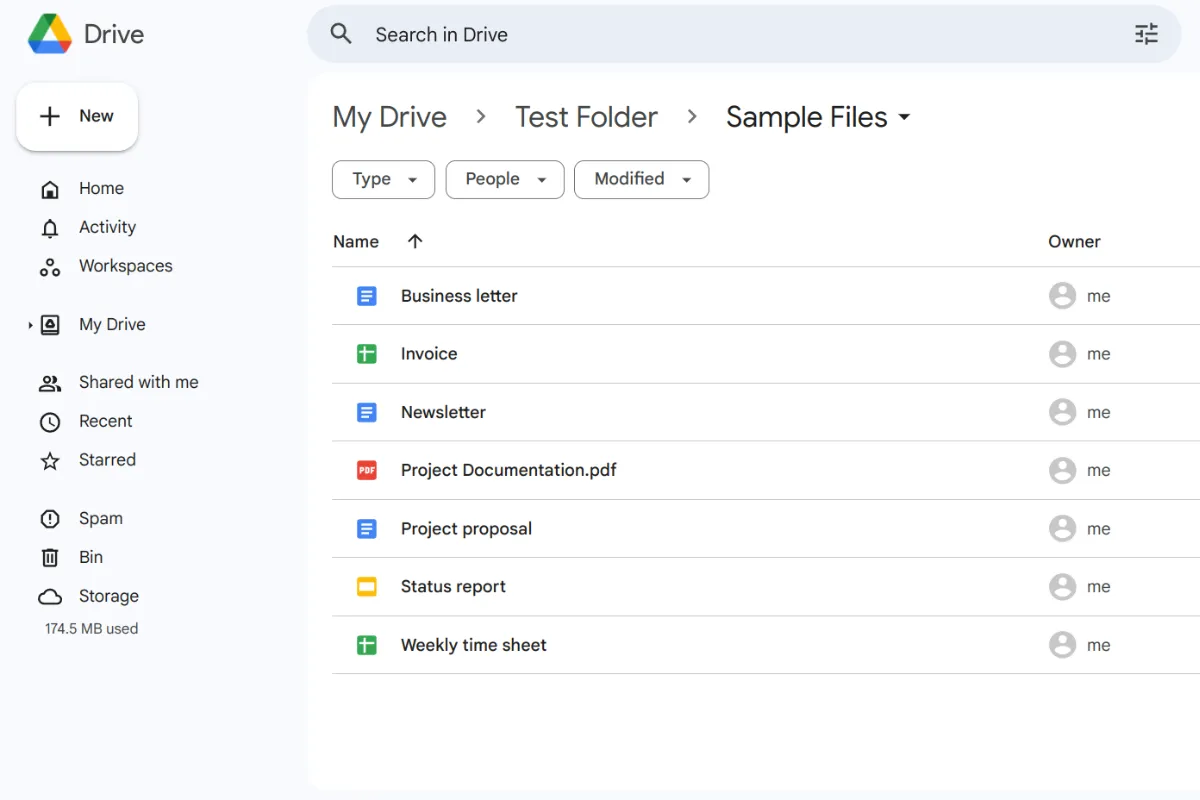
Step 2: Store Files in Google Drive
Section titled “Step 2: Store Files in Google Drive”Ensure that the files you plan to attach are stored in Google Drive. Supported file formats include:
- Google Docs, Google Sheets, Google Slides
- PDF, MS Word, MS Excel, MS PowerPoint
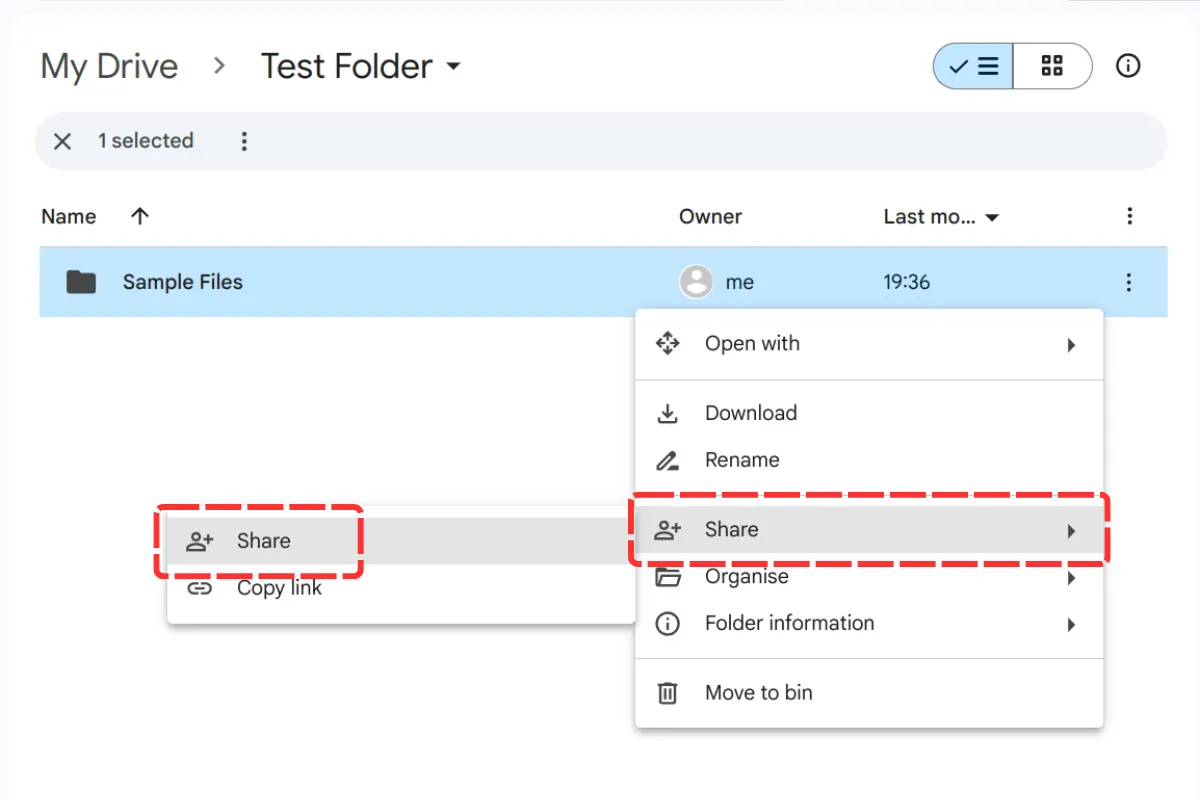
Step 3: Share Files in Google Drive
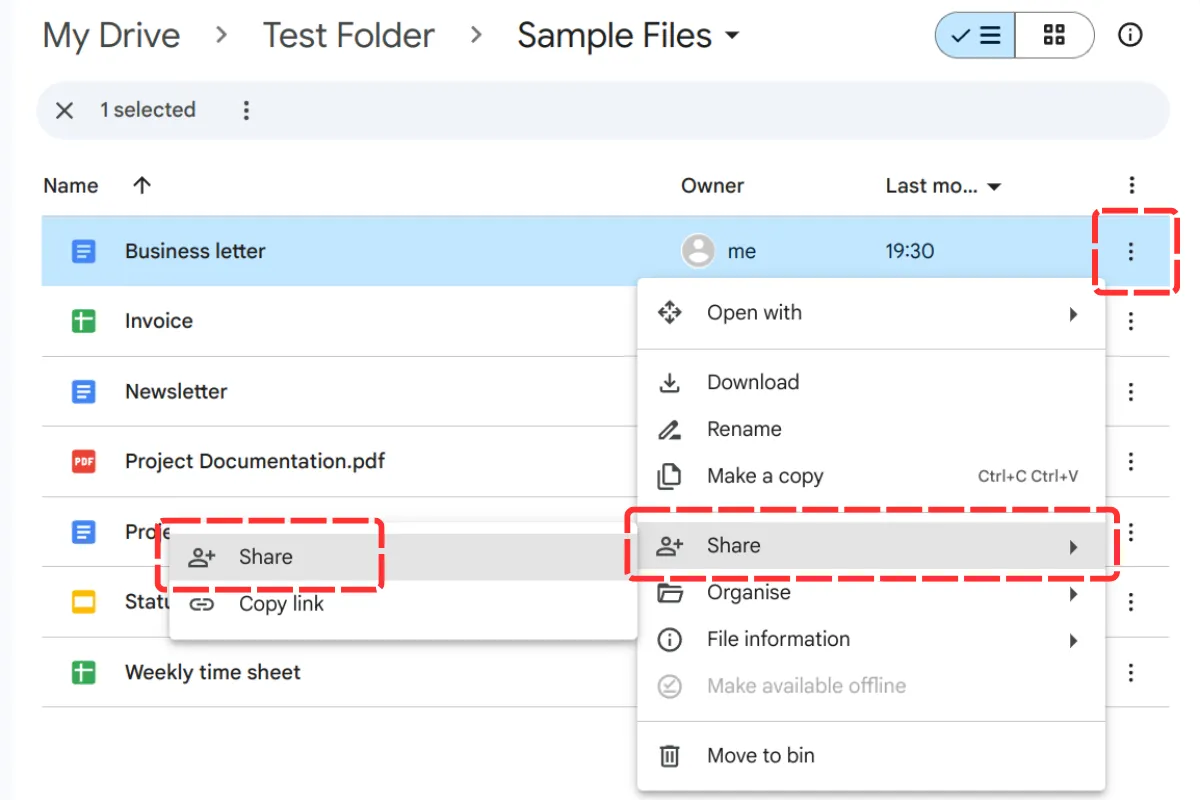
Section titled “Step 3: Share Files in Google Drive”To allow recipients to access attachments:
- Select the file in Google Drive.
- Click the three-dot menu and choose “Share.”
- In the sharing dialog, click “Share” again.
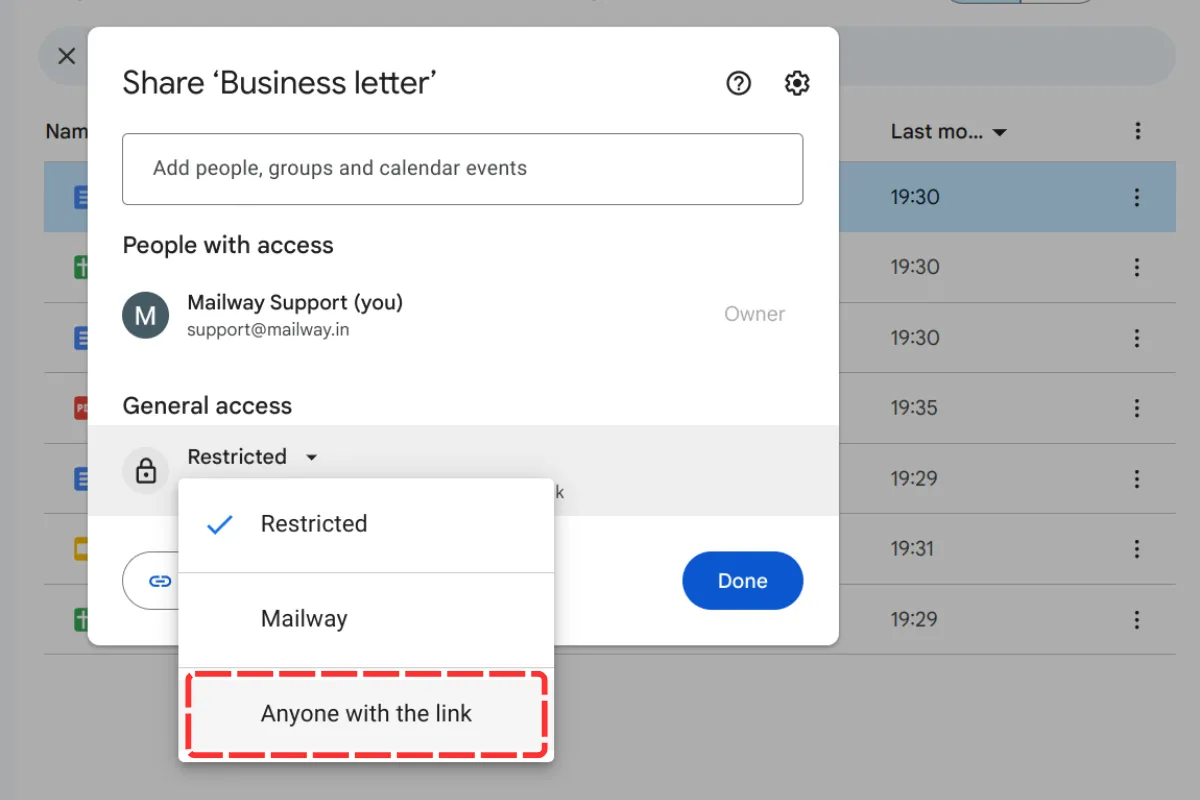
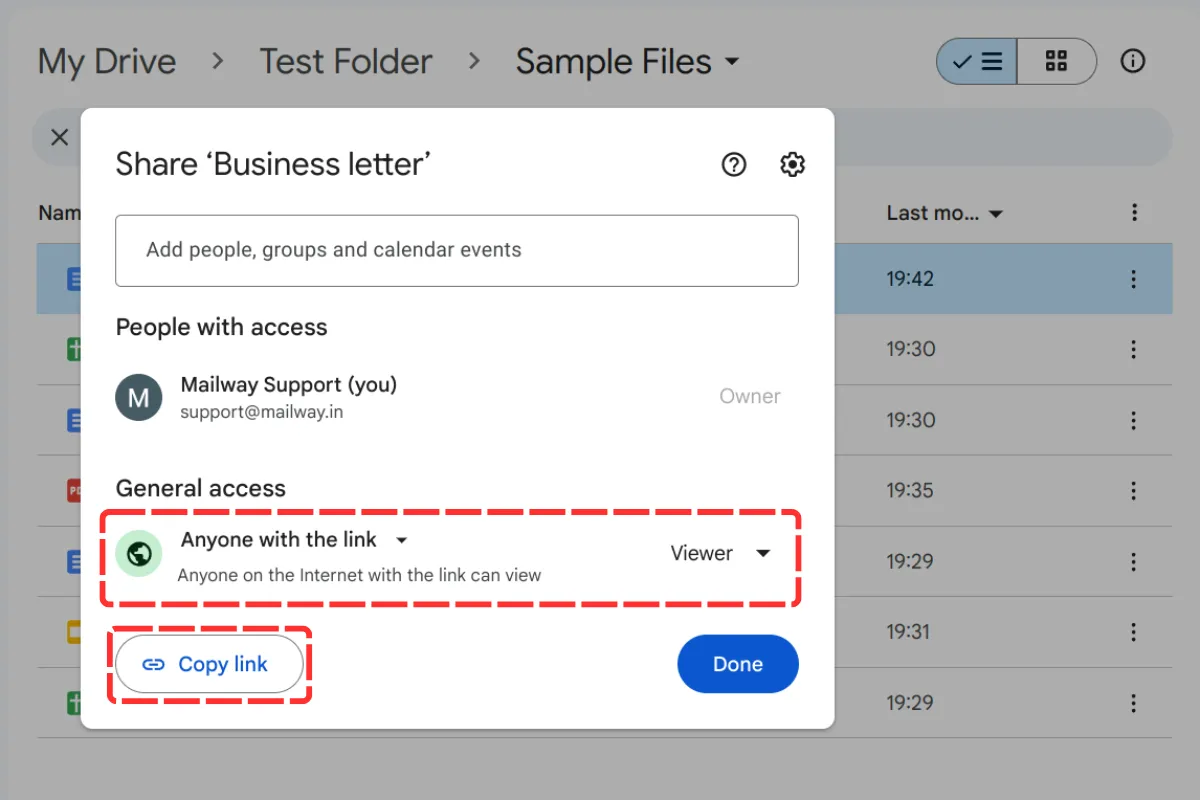
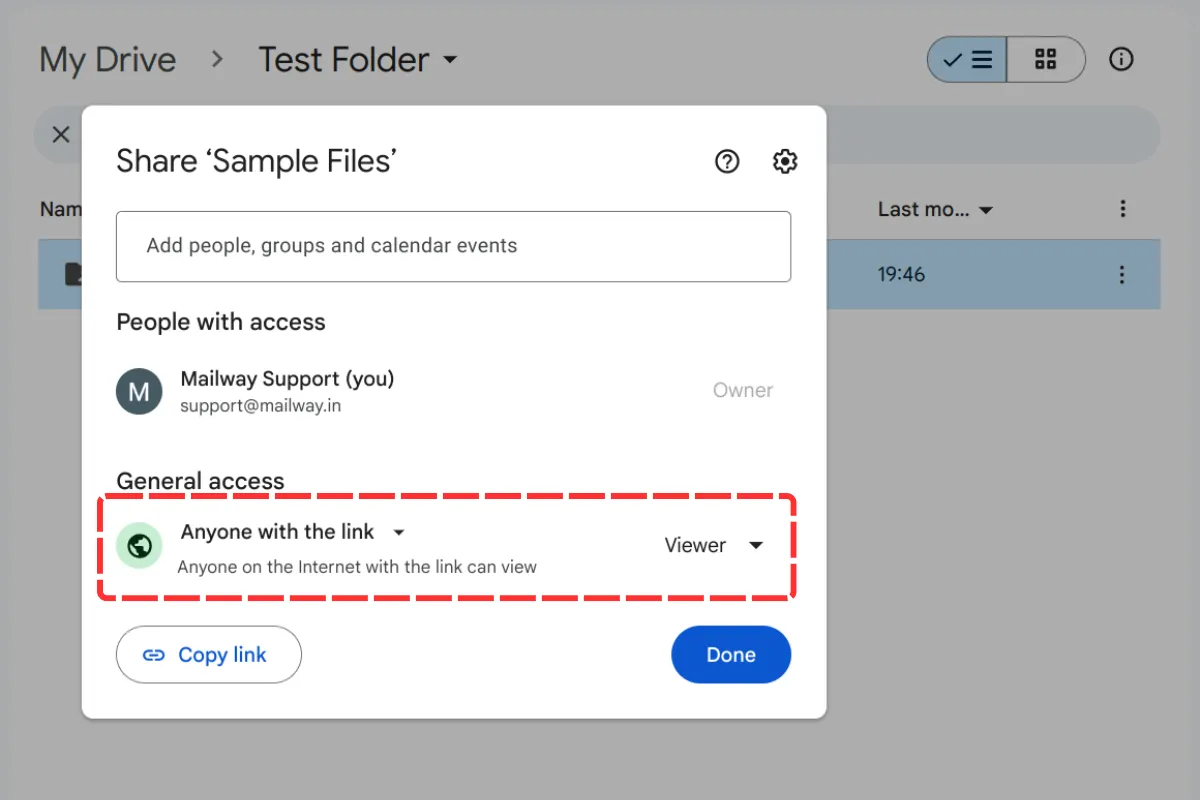
Step 4: Adjust Sharing Settings
Section titled “Step 4: Adjust Sharing Settings”Modify sharing settings to ensure accessibility:
- Set “General Access” to “Anyone with the link.”
- Click “Copy link” to copy the file’s shareable link.
- Click “Done” to close the dialog.
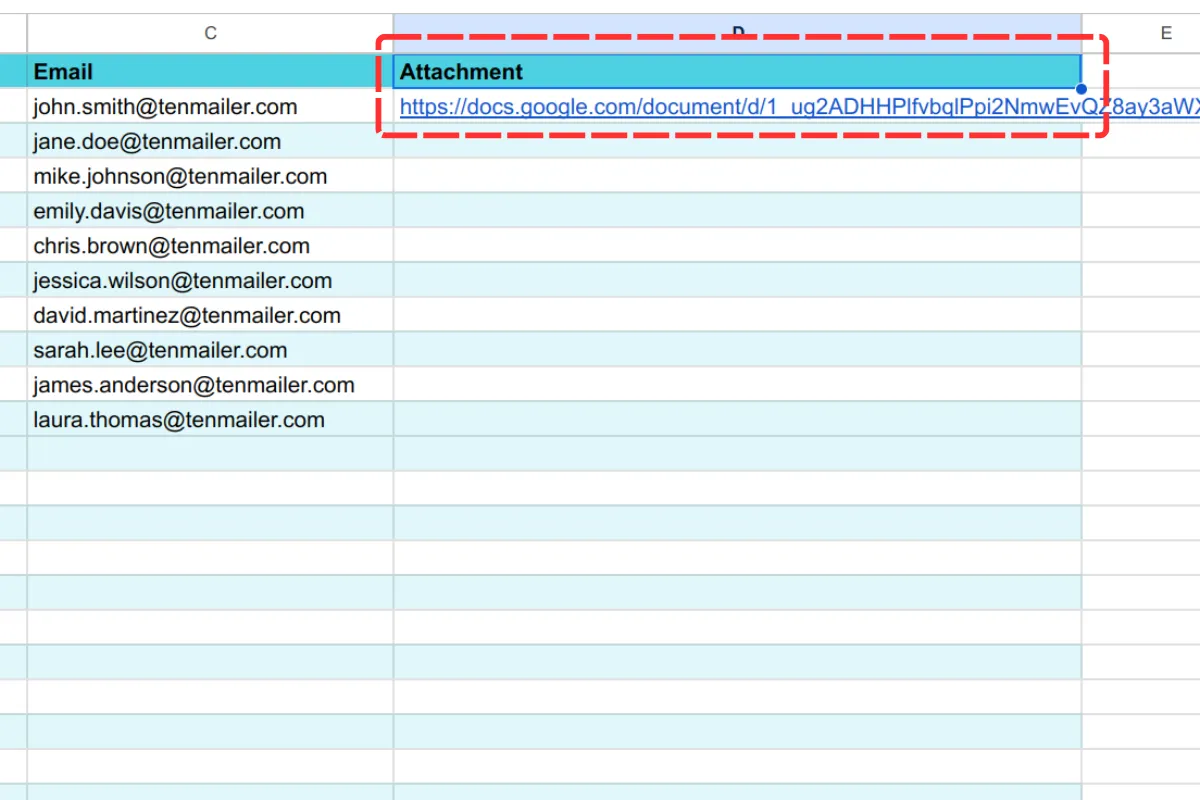
Step 5: Paste Links in Google Sheets
Section titled “Step 5: Paste Links in Google Sheets”Paste the copied link into the “Attachment” column for each recipient. Leave the field blank for recipients who do not require an attachment.
Step 6: Share a Folder for Multiple Files
Section titled “Step 6: Share a Folder for Multiple Files”To simplify sharing, you can share an entire folder:
- Create a folder in Google Drive and move all required files inside.
- Share the folder using the same steps.
- All files within the folder will inherit the shared access.
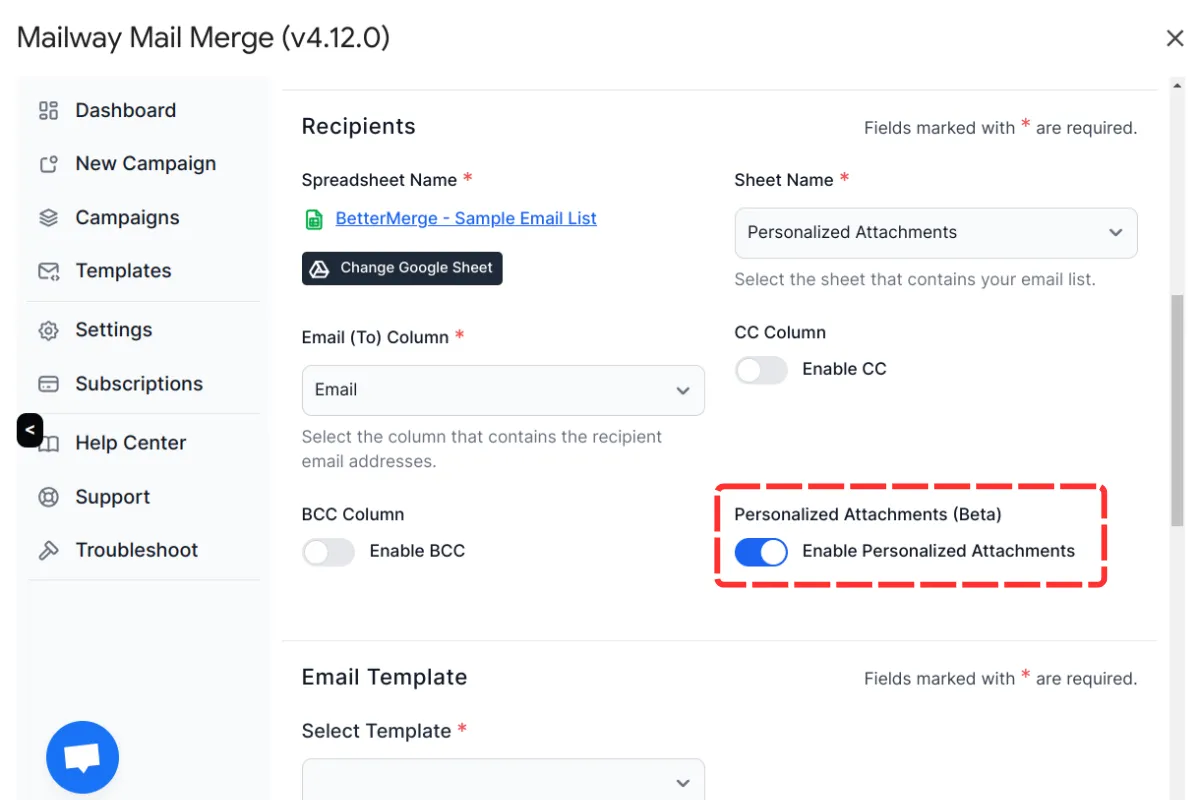
Step 7: Finalize and Send Your Campaign
Section titled “Step 7: Finalize and Send Your Campaign”Once all attachment links are added to Google Sheets:
- Create a new campaign.
- In the “Recipients” section, enable the “Personalized Attachments” toggle.
- Complete the setup, and BetterMerge will automatically include the attachments.
Frequently Asked Questions
Section titled “Frequently Asked Questions”Why use personalized attachments?
Section titled “Why use personalized attachments?”Personalized attachments allow you to send unique files to each recipient, enhancing engagement and relevance.
What file types are supported?
Section titled “What file types are supported?”You can attach Google Docs, Sheets, and Slides, as well as PDFs, Microsoft Word, Excel, and PowerPoint files. Google Drive files are automatically converted to Microsoft Office format.
What is the maximum file size?
Section titled “What is the maximum file size?”Each attachment can be up to 5 MB. For larger files, consider providing a download link instead.
Can I send the same attachment to all recipients?
Section titled “Can I send the same attachment to all recipients?”Yes, you can use the standard attachment feature. Learn more.
Do recipients need special permissions to access attachments?
Section titled “Do recipients need special permissions to access attachments?”No, as long as the file’s sharing settings are set to “Anyone with the link.”
Can I attach multiple files?
Section titled “Can I attach multiple files?”Yes, you can include multiple attachments by adding separate columns in Google Sheets (e.g., “Attachment 1,” “Attachment 2”).
What happens if an attachment field is empty?
Section titled “What happens if an attachment field is empty?”If a recipient’s attachment field is blank, they will receive the email without an attachment.
Can I track whether recipients download the attachments?
Section titled “Can I track whether recipients download the attachments?”BetterMerge does not track attachment downloads, but you can monitor access through Google Drive’s activity log.
How do I ensure file security?
Section titled “How do I ensure file security?”Use “Anyone with the link” only when broad access is acceptable. For sensitive information, restrict access to specific recipients.
Conclusion
Section titled “Conclusion”Personalized attachments enhance email relevance and efficiency. With BetterMerge, you can easily send tailored files, ensuring each recipient receives the correct documents. This feature is ideal for contracts, reports, or other customized materials, making email communication more effective.
New to BetterMerge? Start free — 50 emails/day, no credit card. Questions? Contact support.
BetterMerge is an independent product not affiliated with, endorsed by, or connected to Google LLC. Gmail, Google Sheets, Google Workspace, and Google Workspace Marketplace are trademarks of Google LLC.